
Have you ever noticed how dogs seem to have their own personal fans when it’s hot outside? If you’ve got some ripe bananas and yogurt lying around, you’re just a few steps from creating cool pupsicles that’ll have your furry friend wagging their tail in no time. It’s super easy, and honestly, you might feel a bit like a kitchen magician. So, what flavors do you think your pup would love? Let’s whip up some treats and see what they think.
Why Homemade?
When it comes to feeding your dog, wouldn’t you want what’s best for them? Making homemade treats is a fun way to guarantee your pup gets nutritious ingredients, free from fillers and additives. You know your dog best—what flavors they love, and what their tummy can handle.
Sure, store-bought goodies are convenient, but let’s be honest: who knows what goes into those treats? With homemade Pupsicles, you can whip up something delightful and healthy. Plus, homemade bacon dog biscuits can be a great addition to your dog’s treat repertoire. Additionally, making these treats allows you to explore natural ingredients that may be better for your dog’s health, and choosing high-quality meats can also enhance the nutritional value of your pup’s diet.
Furthermore, it’s a great excuse to play around in the kitchen, right? You might make a mess—like that time you spilled peanut butter everywhere—but it’ll be worth it when your furry friend wagged their tail in delight. Furthermore, making dog treats at home can also help you save money on pet food costs, ensuring that you can treat your pup without breaking the bank.
Dog Treat Ideas
When it comes to satisfying your pup’s taste buds, don’t just stick to the basics. You can whip up some tasty treats like Peanut Butter Banana Pupsicles or Pumpkin Spice Pupsicles—your dog will love ’em. Have you ever thought about mixing in flavors like carrot and coconut, or apple and cinnamon? You might also consider adding ingredients like pumpkin dog treats to enhance flavor and nutrition in your homemade creations. To make these treats even better, try incorporating delicious sweet potato dog treats which are rich in vitamins and perfect for your furry friend. Additionally, using frozen dog treats can help cool down your pup on hot days! Adding soft dog treats to your pup’s diet can provide a delightful variety and keep their tail wagging in excitement!
1. Peanut Butter Banana Pupsicles
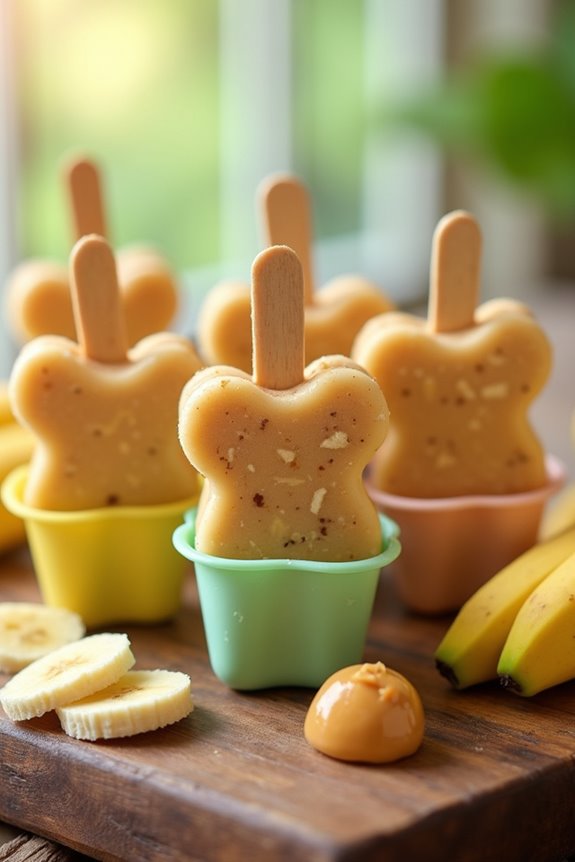
Are you ready to treat your pup to something special? Peanut Butter Banana Pupsicles aren’t just a tasty treat; they’re super easy to whip up with just a few ingredients. Plus, you can add some fun extras to really customize the flavor, making your furry friend’s tail wag even more. These pupsicles are a great way to incorporate homemade bacon dog treats into your dog’s diet for added flavor and variety. Additionally, using natural peanut butter ensures that you’re providing your dog with a nutritious and safe ingredient.
Ingredients
Making these peanut butter banana pupsicles isn’t just a fun project; it’s a delightful way to cool down your furry friend on a hot day.
Plus, your pup will love the tasty blend of flavors. Here’s what you’ll need to whip up these invigorating treats:
- 1 ripe banana (the mushier, the better for mixing)
- 1 cup plain yogurt (make sure it’s unsweetened and xylitol-free)
- 1/2 cup peanut butter (check that it’s dog-safe, with no added sugar or salt)
- 1 tablespoon honey (optional, for a touch of sweetness)
- 1/2 cup water (to help blend everything smoothly)
These ingredients may just be a few, but trust me, they pack a serious punch in flavor.
And bonus: they’re all pantry staples you probably already have at home. So, gather your ingredients, and let’s get those pupsicles rolling (or freezing, rather)!
Step by Step Instructions
- Gather your ingredients: You’ll need ripe bananas, peanut butter, and plain yogurt. Feel free to channel your inner chef and pick the best ones.
- Peel and slice the bananas into small pieces. This is where the fun begins—smash a little if you want to, but not too much; we still want some texture.
- In a mixing bowl, combine the sliced bananas, peanut butter, and yogurt. Use a fork to mash everything together. Make sure it’s well mixed but not too smooth—a few chunks are okay.
- Spoon the mixture into ice cube trays or silicone molds. Try to fill them evenly, but hey, don’t stress if one’s a little over-scooped.
- Cover the trays with plastic wrap or a lid to prevent freezer smells from sneaking in.
- Place the filled trays in the freezer and let them freeze for around 4-6 hours, or until solid. Grab a snack while you wait; you deserve it.
- Once frozen, carefully pop the pupsicles out of the molds. If they’re stubborn, run some warm water over the bottom of the tray for easier removal.
- Serve one to your dog and watch the magic happen. Just remember to keep an eye on them—they might get a bit messy.
- Store any leftovers in an airtight container in the freezer for up to two weeks. Cool completely before serving to your dog, unless you want a messy pup on your hands.
Optional Add-ons
While the basic pupsicle recipe is already a winner, why not jazz it up a bit with some optional add-ons?
Try mixing in mashed banana and creamy peanut butter for a flavor explosion. Your pup will think they hit the treat jackpot.
Just remember to stick to dog-safe ingredients. Who knew being a dog chef could be this fun?
2. Yogurt and Berry Pupsicles
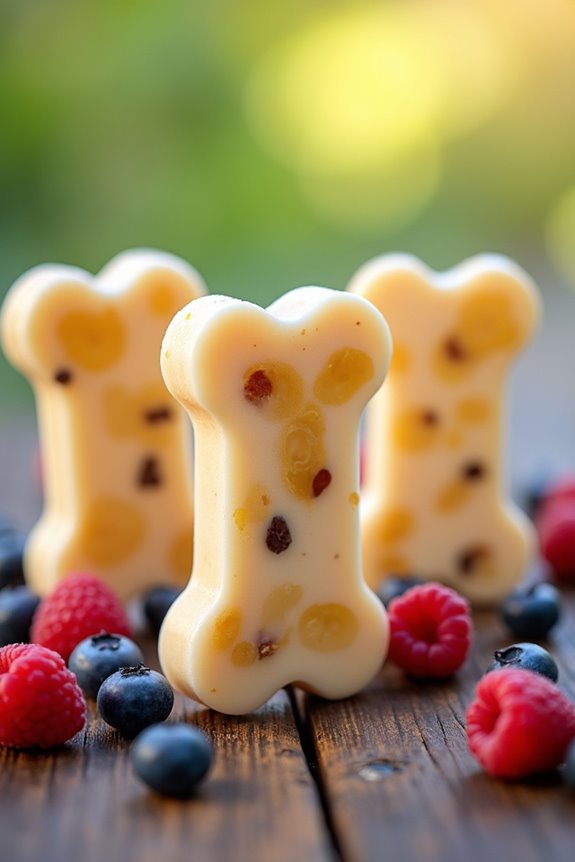
Now, let’s whip up some Yogurt and Berry Pupsicles that’ll make your pup’s tail wag with joy. You’ll need a few simple ingredients, step-by-step instructions, and maybe a couple of optional add-ons to really make these treats pop. Ready to treat your furry friend to something delicious and healthy?
Ingredients
Who doesn’t want to spoil their furry friend with a special treat, especially on a hot day?
These pupsicles are a delightful way to keep your pup cool while indulging their taste buds. The best part? You likely already have some of these ingredients hanging around.
Let’s get right into what you’ll need to whip these up.
- 2 cups plain yogurt (make sure it’s free of any artificial sweeteners)
- 1 cup mixed berries (fresh or frozen—just avoid grapes!)
- 1 tablespoon honey (optional for sweetness; skip it for puppies under one year)
- 1 tablespoon peanut butter (check that it doesn’t contain xylitol)
- A handful of dog biscuits or treats (for a crunchtastic surprise)
Now, what could be easier than that?
Just a few items to gather, and before you know it, your pup will be enjoying a reviving treat.
Because really, who can resist the pleading eyes of a dog?
Step by Step Instructions
To make delicious yogurt and berry pupsicles for your furry friend, just follow these easy steps. Your pup will appreciate the cool treat on a hot day and you’ll find it simple to whip up.
- Gather all your ingredients: yogurt, berries (fresh or frozen), and a blender. Make sure to choose dog-safe berries like blueberries or strawberries.
- In the blender, add 1 cup of yogurt—plain, unsweetened Greek yogurt works great. It’s creamy and dogs love it.
- Toss in ½ cup of your chosen berries. If you’re using frozen berries, no need to thaw them.
- Blend on medium speed until the mixture is smooth. (You want it to be creamy, not chunky.)
- Grab a popsicle mold or ice cube tray. This is where the magic happens.
- Pour the yogurt and berry blend into the molds, filling each section about three-quarters full to allow for expansion.
- Insert sticks or any healthy dog-safe treat you have handy (a carrot or small biscuit works too) into the center of each mold.
- Place the molds in the freezer. Let them freeze for at least 4 hours, or until solid.
- Once they’re frozen, remove them from the molds. (If they’re stuck, run warm water over the outside of the molds for a few seconds.)
- Cool completely before serving to your dog. Remember, this is a treat, so moderation is key, even for our furry pals.
Now, go ahead and watch your doggo enjoy every tasty lick of these invigorating pupsicles. They’re bound to be a new favorite treat.
Optional Add-ons
While those yogurt and berry pupsicles are sure to get tails wagging, let’s explore some optional add-ons that can amp up the fun and flavor.
Consider mixing in some peanut butter for a creamy twist or sneaking in banana pieces for a natural sweetness.
Got leftover pumpkin puree? It adds flavor and digestive benefits.
Your pup won’t know what hit ’em.
3. Pumpkin Spice Pupsicles

Ready to whip up some tasty Pumpkin Spice Pupsicles for your furry friend? You’ll want to gather a few simple ingredients, and I promise, it’s easier than it sounds. Plus, I’ll share step-by-step instructions and some fun optional add-ons to make your pup’s treat even more special.
Ingredients
Who doesn’t love a chilly treat on a hot day? Well, your furry friend deserves to cool off too! These pumpkin spice pupsicles aren’t just delicious— they’re simple to whip up and safe for your canine companion. Get ready to see that tail wag!
- 1 cup pure pumpkin puree (make certain it’s not spiced or sweetened)
- 1 ½ cups unsweetened yogurt (plain and dog-safe, like Greek yogurt)
- 1 tablespoon peanut butter (just make sure it’s xylitol-free)
- 1 teaspoon cinnamon (yes, it’s safe in small amounts)
- ½ cup water (for the right consistency)
There you go! Just these few ingredients, and you can create a delightful treat for your dog that’s also a great way to use up that pumpkin from, well, October? Or whenever! Your pup will love you even more, if that’s possible.
Step by Step Instructions
- Gather all your ingredients: plain yogurt, pumpkin puree, honey, and a sprinkle of cinnamon. Make sure your pup isn’t in the kitchen, or you’ll have a furry sous-chef trying to sneak treats.
- In a large mixing bowl, combine 1 cup of plain yogurt and 1 cup of pumpkin puree. Mix until smooth and well-blended. If you feel like a pro, channel your inner chef and give it a little taste—just don’t get too carried away.
- Drizzle in 1 tablespoon of honey and a pinch of cinnamon. Mix again until everything is combined. Remember, we’re making a tasty treat, not a science experiment—no need for excessive precision here.
- Find your favorite silicone molds or ice cube trays. If you have fun shapes, even better—because who wouldn’t want a bone-shaped pupsicle?
- Spoon the mixture into the molds, filling them about three-quarters full. Leave some space for expansion as they freeze (trust me, you don’t want a pumpkin explosion).
- Once filled, gently tap the molds on the counter to remove any air bubbles. This will make sure they freeze nicely without any weird gaps.
- Place the molds in the freezer and leave them there for at least 4 hours, or until they’re completely solid. Use this time to clean up your kitchen, or grab a well-deserved snack for yourself.
- When they’re ready, carefully remove the pupsicles from the molds. You might need to run a little warm water over the outside of the mold to help release them, but avoid dumping them in the sink—yogurt and pumpkin isn’t a great combo for your plumbing.
- Cool completely before serving to your dog. Once they’re ready, watch as your furry friend digs into their new favorite treat—your hard work will surely earn you some serious puppy love.
Optional Add-ons
If you’re looking to elevate your pupsicle game, why not jazz them up with some optional add-ons?
Imagine mixing in a spoonful of pumpkin puree for a delightful pumpkin spice treat. Your pup’ll go wild for that extra flavor.
Or toss in some peanut butter—who can resist that?
These little twists can make your pupsicles the talk of the dog park.
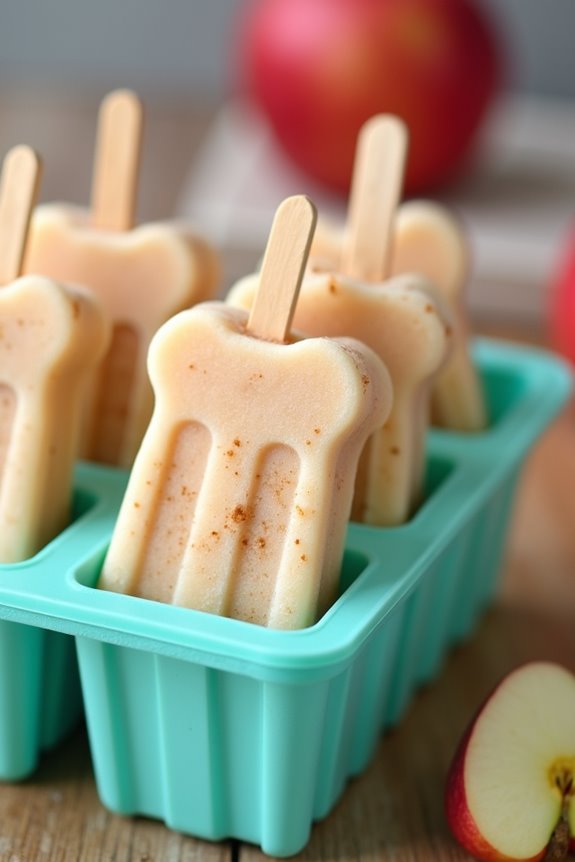
4. Apple Cinnamon Pupsicles Recipe
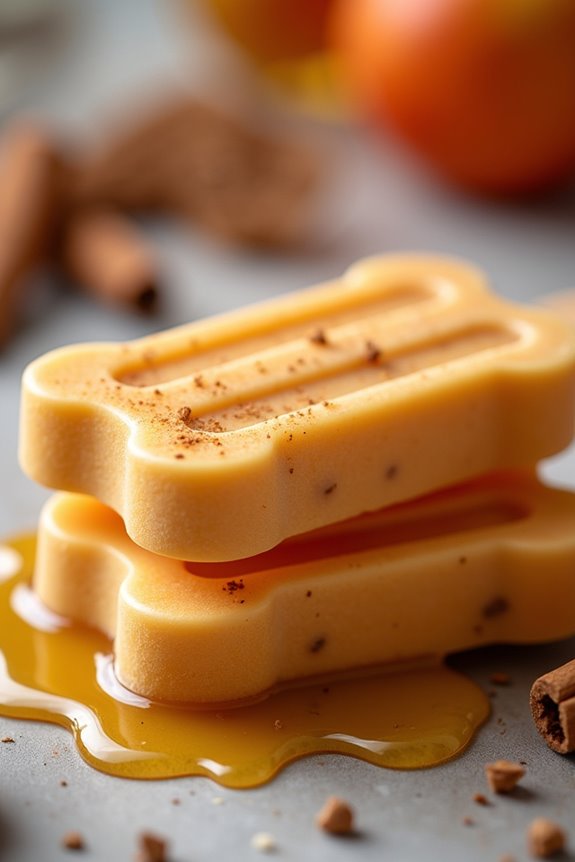
Now that you’ve mastered the Pumpkin Spice Pupsicles, it’s time to get apple-crazy with a tasty twist!
In this section, you’ll discover the must-have ingredients, easy step-by-step instructions, and even some fun add-ons that’ll make your pup’s tail wag like crazy.
Ingredients
Looking to spoil your furry friend with something delicious and safe? These Pupsicles are a fantastic treat that your dogs will drool over while keeping their tummies happy.
With the perfect blend of apple and cinnamon, they’re sure to become a tail-wagging favorite. Plus, making them is as easy as pie—or should I say, easy as pupsicles?
- 2 cups unsweetened applesauce
- 1 cup plain yogurt (preferably low-fat)
- 1 teaspoon ground cinnamon
- 1 tablespoon honey (optional, only if your pup is over one year old)
- 1/2 cup water (use for thinning, if needed)
Just gather these few ingredients, and you’re halfway to creating a revitalizing treat for your four-legged family member.
Simple, right? Honestly, with how easy it is, you might even feel a tiny spark of jealousy while your pup enjoys their homemade treat.
Just don’t forget to taste-test the yogurt yourself first—I mean, someone’s gotta make sure it’s good enough for your pet.
Step by Step Instructions
Want to whip up some delicious apple cinnamon pupsicles for your furry friend? This recipe is simple, fun, and sure to keep those tails wagging. Follow these easy steps to create a cool treat your dog will love.
- Gather all your ingredients: 1 cup of unsweetened applesauce, 1 cup of plain Greek yogurt, and 1 teaspoon of ground cinnamon.
- In a mixing bowl, combine the unsweetened applesauce and Greek yogurt.
- Whisk the mixture until well blended and creamy (don’t skimp on this—get it nice and smooth).
- Sprinkle in the ground cinnamon and mix well until fully incorporated (the aroma is already making me drool a little).
- Prepare your molds or ice cube trays by rinsing them lightly with water to make removal easier later on.
- Pour the mixture into your molds, leaving a little space at the top, as it may expand when frozen.
- If you want, you can add small bits of apple into the molds for an extra surprise (just make sure they don’t contain seeds—our pups don’t need that drama).
- Carefully place the molds in the freezer and freeze for at least 3-4 hours, or until the pupsicles are solid.
- Once frozen, take them out of the molds with a gentle twist (you might feel like a magician at this moment).
- Cool completely before serving to your dog.
There you go—your pupsicles are ready to impress! Just watch out for that happy dog dance when they get a taste.
Optional Add-ons
Pupsicles are already a hit with your furry friend, but why stop there?
Consider adding some chopped apples or a sprinkle of cinnamon to mix things up. Your pup will love the invigorating burst of flavor.
You might want to try swapping yogurt for peanut butter too. Just be ready for the potential drool—it’s worth it for those happy tail wags!
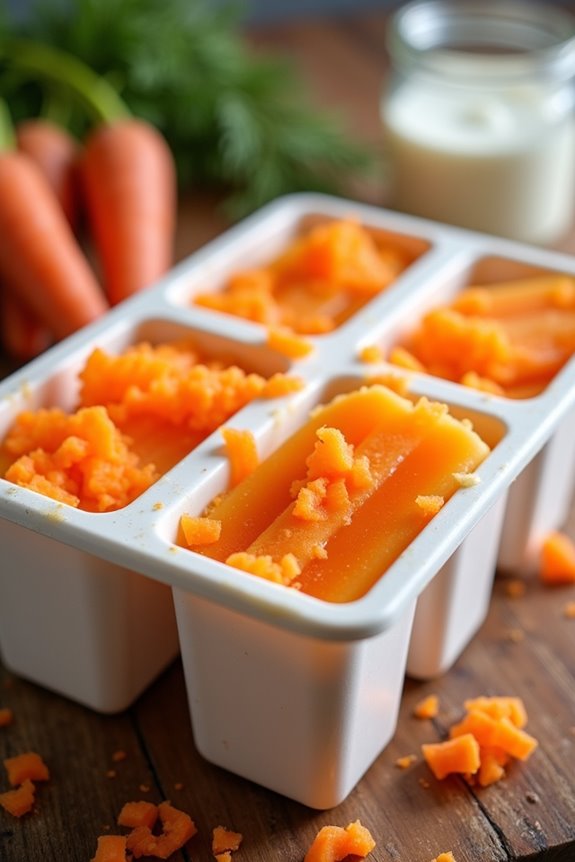
5. Carrot Coconut Pupsicles Recipe
Ready to whip up some tasty Carrot Coconut Pupsicles? You’ll need just a few simple ingredients, and I’ll guide you through each step, so your pup can enjoy a revitalizing treat. Plus, there’s room to get creative with optional add-ons that might just make these pupsicles the highlight of their day.
Ingredients
Looking for a fun and invigorating treat for your furry friend? These carrot coconut pupsicles are an excellent way to keep your pup cool, especially on those warm days when they’re begging for a little something special. Not only are these ingredients easy to find, but they’re also packed with goodness your dog will love. So, let’s gather what we need, shall we?
- 1 cup grated carrots
- 1 cup coconut milk (make sure it’s unsweetened and plain)
- 2 tablespoons honey (optional, for sweetness)
- 1/4 cup plain yogurt (preferably low-fat)
- 1/2 cup water
- A handful of shredded coconut (also unsweetened)
Just imagine your pup’s wagging tail as they enjoy these delightful treats. It’s like a mini celebration in every bite, and honestly, who can resist giving them that joy?
Step by Step Instructions
1. Gather all your ingredients: 2 cups of grated carrots, 1 cup of unsweetened coconut yogurt, and 1 tablespoon of honey. Don’t forget the ice cube tray (or silicone molds)—that’s your secret weapon for making these pupsicles.
2. In a mixing bowl, combine the grated carrots and coconut yogurt. Mix until well combined.
(Get ready for a colorful treat; those bright orange carrots will sneak in some nutrition.)
3. Drizzle in the honey and mix again. This will add just the right touch of sweetness.
(Dogs may not need sugar, but a little honey won’t hurt!)
4. Pour the mixture into your ice cube tray or silicone molds. Fill each section to the top, but leave a little room for expansion as they freeze.
(If you spill a bit, that’s extra taste-testing for you, right?)
5. Tap the tray gently on the counter to remove air bubbles. This helps to prevent any funky ice shards later.
6. Cover the tray with plastic wrap, then pop it into the freezer. Let it chill for about 4–6 hours, or until completely frozen.
(Go ahead and binge-watch your favorite show while you wait.)
7. Once frozen, gently wiggle the pupsicles out of the tray. If they’re stubborn, you might need to run a warm washcloth on the bottom of the tray for a few seconds.
8. Store the pupsicles in an airtight container or freezer bag until you’re ready to treat your dog.
Cool completely before serving to your dog. They’ll thank you with a wagging tail and maybe even a happy bark.
Optional Add-ons
While your pupsicles are freezing, why not jazz up the recipe with some optional add-ons?
Try mixing in shredded carrots for extra crunch or a splash of coconut milk for creaminess.
You could even toss in some peanut butter—because, let’s be real, what pup doesn’t love that?
Get creative and discover your dog’s new favorite flavor combo. It’s all about fun, right?
6. Chicken Broth Pupsicles Recipe
Let’s whip up some Chicken Broth Pupsicles that’ll make your pup wag with joy. You’ll only need a few simple ingredients, plus I’ve got step-by-step instructions that’ll guide you through the process—trust me, it’s as easy as pie! And if you’re feeling adventurous, I’ll share some fun optional add-ons to really spice things up.
Ingredients
When it comes to whipping up some cool treats for your furry friend, simplicity is key. This pupsicle recipe uses just a few ingredients that are safe and easy to find. Plus, they’re super simple to throw together. You might even have some of these items on hand already.
Let’s plunge into what you’ll need:
- 2 cups low-sodium chicken broth (make sure it’s dog-friendly)
- 1 cup plain Greek yogurt (unsweetened, of course)
- 1 ripe banana, mashed (who can resist a banana?)
- 1 tablespoon peanut butter (make sure it doesn’t have xylitol)
- Optional: small dog-safe treats or berries for decoration
These ingredients work together to make a deliciously invigorating snack that will have your pup wagging their tail and begging for more.
And trust me, it’s so easy that even if you’re a bit of a kitchen klutz like me, you’ll nail it. So, grab those items and let’s get this pupsicle party started!
Step by Step Instructions
1. Gather your ingredients: You’ll need chicken broth (low-sodium is best), some diced dog-safe fruits or veggies, and ice cube trays or silicone molds.
2. If you’re making homemade chicken broth, start by boiling chicken in a pot of water for about 1-2 hours. Make sure to let it cool before straining it.
(Remember, you’re not making a stew for dinner, so don’t add any spices!)
3. Once your broth is ready, let it cool to room temperature.
4. While the broth is cooling, chop up any dog-friendly fruits or veggies you want to include, like blueberries, bananas, or carrots.
5. Take your ice cube trays or silicone molds, and fill them halfway with the chicken broth.
6. Sprinkle diced fruits or veggies into each mold, then fill the rest with more chicken broth.
(Don’t worry about perfection; dogs aren’t picky eaters anyway!)
7. Carefully tap the trays on the counter to remove any air bubbles.
8. Place the trays in the freezer and leave them to freeze completely. This usually takes about 4-6 hours.
9. Once frozen solid, remove the pupsicles from the trays. If they’re stubborn, run warm water over the exterior of the molds for a few seconds.
10. Store the pupsicles in a sealable plastic bag or container in the freezer until you’re ready to treat your furry friend.
Cool completely before serving to your dog.
Optional Add-ons
Now that you’ve whipped up some delicious pupsicles, why not take them to the next level?
Adding optional goodies like shredded chicken, peanut butter, or diced fruits can make your creations irresistible. Just mix them in before freezing.
Trust me, your pup will think they’re royalty. And who doesn’t want a happy pup? It’s like the cherry on top of this frozen treat!
7. Sweet Potato and Pea Pupsicles

Ready to treat your pup to something special? Sweet potato and pea pupsicles pack a nutritious punch, and making them is a breeze. Let’s go through the ingredients, step-by-step instructions, and a few fun add-ons that’ll have your furry friend wagging their tail in no time.
Ingredients
When it comes to whipping up some tasty pupsicles for your furry friend, the ingredients are both simple and delightful.
You probably have most of them lurking in your pantry or fridge right now. So let’s gather what you need to get started on these yummy doggie treats.
- 1 cup sweet potato, cooked and mashed (because who doesn’t love a good sweet potato?)
- 1 cup peas, cooked (yep, those little green balls of joy)
- 1/2 cup low-sodium chicken broth (make sure it’s dog-friendly, please!)
- 1 tablespoon of pure peanut butter (only the kind without added sugar or xylitol, because we’re not trying to play with fire here)
- A sprinkle of parsley (optional, but it can give those pups a fresh breath — because let’s be honest, sometimes it’s needed)
When you have these items on hand, you’re halfway to making a frozen delight that will have your pup wagging their tail like a helicopter.
Just think about how proud you’ll feel when your dog gives you that “wow, you’re the best” look after tasting these.
Who knew kitchen magic could be so simple?
Step by Step Instructions
- Start by gathering all your ingredients: sweet potatoes, peas, plain yogurt, and any additional flavors your pup may enjoy, like pumpkin or peanut butter.
- Preheat your oven to 350°F (175°C). We want it warm enough to coax those sweet potatoes into tender delights.
- Wash and peel the sweet potatoes. Cut them into small cubes for quicker cooking. Tiny pieces are easier for your pup, and you’ll avoid any potato tug-of-war later.
- Boil a pot of water over high heat. Once boiling, add the sweet potato cubes and cook for about 15 minutes, or until easily pierced with a fork.
- Drain the sweet potatoes and transfer them to a mixing bowl. Let them cool for a few minutes because nobody likes hot food, not even your pup!
- Mash the sweet potatoes with a fork until smooth. Channel your inner chef, but don’t overthink it; a few lumps are fine (your pup will probably enjoy the texture).
- In a separate bowl, mix the yogurt and peas until well combined. If you’re feeling adventurous, add a spoonful of peanut butter for extra yum!
- Fold the mashed sweet potatoes into the yogurt mixture until everything is well mixed. Just enough so that the sweet potato and yogurt get cozy together.
- Pour the mixture into ice cube trays or silicone molds. Fill them to the top, but leave a little space because these little pops will expand as they freeze.
- Place the trays in the freezer and let them freeze for at least 4 hours, or until solid. (Patience is a virtue, but think of the reward.)
- Once they’re frozen, simply pop the pupsicles out of the molds. If they’re stubborn, run a little warm water over the outside of the tray to help them along.
- Cool completely before serving to your dog. Make sure the pupsicle is at a safe temperature, and watch your pup go wild for their icy treat!
Enjoy making these tasty creations for your furry friend. They’ll be begging for more!
Optional Add-ons
If you think the sweet potato and pea pupsicles are delightful as they are, just wait until you immerse yourself in the world of optional add-ons!
Toss in some banana puree for a fruity twist, or try a dollop of plain yogurt for creaminess. You might even consider adding shredded chicken.
Who knows? Your pup might just think you’re a culinary genius.
Freeze in Silicone Molds
Ready to make your pup’s day with some homemade treats? Freezing your pupsicles in silicone molds is a fun, easy way to create adorable snacks.
First, grab your favorite silicone molds—shapes like bones or paws always get a giggle. Pour your mixture into the molds, but don’t overfill ’em; you want room for expansion.
Now, here comes the waiting game. Pop those molds in the freezer for about 4 to 6 hours. Yes, you might’ve to distract your impatient pup who’s anxiously watching, hoping for a nibble.
When they’re fully frozen, carefully remove the treats. If they stick, a quick soak in warm water can work wonders. Trust me, I’ve wrestled with stubborn molds before; it’s not pretty.
Your dog might just do a happy dance when they finally see those tasty treats. Enjoy being their favorite chef, even if you don’t always follow the recipe perfectly.
Frequently Asked Questions
Can I Use Regular Ice Trays Instead of Silicone Molds?
Yes, you can use regular ice trays instead of silicone molds. Just be cautious, as they might be harder to remove your treats from. A little water around the edges can help loosen them up!
How Long Do Pupsicles Last in the Freezer?
Pupsicles typically last in the freezer for about three months. Just make sure you store them in an airtight container to maintain freshness. After that, they might lose flavor and texture. Enjoy those treats!
Are There Any Fruits Dogs Should Avoid in Pupsicles?
Yes, dogs should avoid grapes, raisins, cherries, and citrus fruits. These can be toxic or cause digestive upset. Always check for dog-safe fruits before making any frozen treats, ensuring your pup stays healthy and happy.
How Often Can I Give My Dog Pupsicles?
You can give your dog pupsicles a few times a week, depending on their overall diet and health. Just remember to monitor their reaction and adjust the frequency if needed for digestive comfort.
Can I Add Supplements or Medications to the Pupsicle Recipe?
Yes, you can add supplements or medications to the recipe, but be cautious. Always consult your vet first to guarantee the ingredients are safe for your dog and won’t affect the taste or texture.