So, you’ve got a furry friend tearing through your house like a tornado, and you’re thinking a dog gate might just be the answer. Great idea! A well-crafted gate can be both functional and stylish—who says pet safety can’t look good? Imagine a rustic pallet gate or a sleek sliding barn door. Sounds tempting, right? Stick around, because I’ve got some creative DIY dog gate ideas that will keep your pup contained and your home looking fabulous.
Stylish Pet Barrier Designs
When you want to keep your furry friend safe but also want to maintain a beautiful home, stylish pet barriers can save the day.
A DIY dog gate can be both functional and aesthetically pleasing. Imagine this: you’re using reclaimed wood, a little paint, and your best creativity to craft a unique barrier that fits your decor.
You can make it a striking feature, maybe even adding some cute designs or patterns. Think about using some fabric to soften the look, too.
And hey, if you trip over it while working on your masterpiece, just chalk it up to “artistic expression.” The key is to enjoy the process and create something that shows off your personality while keeping your pup secure.
Our Collection
Let’s talk about our collection of dog gates that’ll keep your furry friend safe and sound, all while fitting snugly into your home’s style.
You’ve got options like a repurposed wooden pallet gate for the rustic charm, or even a sliding barn door gate that adds a fun twist.
Whatever your vibe, these gates aren’t just functional—they’re a chance to show off your creativity, and trust me, you’ll feel pretty cool making one yourself.
1. Repurposed Wooden Pallet Gate
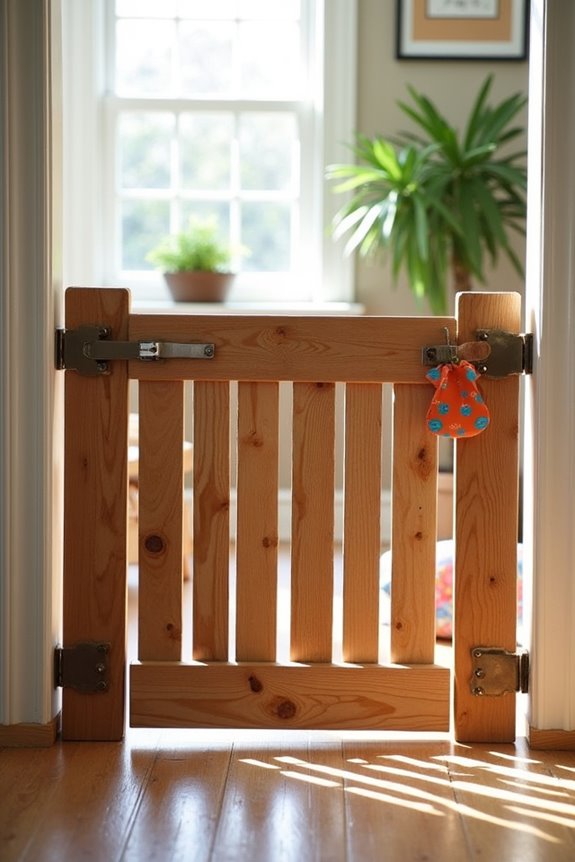
Looking for an easy and budget-friendly way to keep your furry friend safe? Check out this stylish repurposed wooden pallet gate. Not only does it add a charming rustic touch to your home, but it also saves you cash compared to buying a fancy pet gate.
Plus, it’s satisfying to create something with your own two hands!
Materials Needed
- 2-3 wooden pallets (as many as you need for the gate size)
- Hinges (2-3 depending on the height of your gate)
- Gate latch (1 for securing the gate)
- Sandpaper or a sanding block
- Wood stain or paint (optional)
- Paintbrush (if staining/painting)
- Drill and drill bits
- Screwdriver
- Measuring tape
- Safety goggles
- Work gloves
Step-by-Step Instructions
1. Select Your Pallets: Check around your home or at local stores for wooden pallets. Choose ones that are sturdy and free from damage. Just avoid splintery ones—no one wants a nasty surprise during assembly.
2. Measure and Cut: Determine the width and height of your gate. A common size is about 30 inches tall and 36 inches wide, but feel free to adjust based on your space. Use your measuring tape to mark cut lines on the pallets, and then saw the pallets down to size.
3. Sand It Down: Once your pallets are cut, grab your sandpaper and start smoothing out any rough edges. Trust me; no one wants a splinter when they’re simply trying to keep their dog safe.
4. Stain or Paint (if desired): Want a pop of color? Now’s the time to paint or stain your pallets. Use the paintbrush to apply that stain or color. Let it dry completely.
And yes, you can totally paint them pink if you want—who’s gonna stop you?
5. Attach Hinges: With your pallets all dried and pretty, it’s time to attach the hinges. Position the gate where you want it to be placed (like where a door would swing open). Attach Hinges on one side of the gate and the corresponding side of the wall or post it’s leaning against.
6. Add the Latch: Secure the latch on the opposite side of the hinges, ensuring it’s reachable but safe. You want to be able to open it with ease but still keep those sneaky pups at bay.
7. Test It Out: Give that gate a swing and check that it opens and closes smoothly. You might need to do some adjustments, but hey, just think of it as a love exercise between you and your new project.
Optional Add-ons/Variations
- Paint a Mural: Feeling artsy? Use stencils or freehand designs to adorn your gate with cute doggy sayings or paw prints.
- Add a Fabric Panel: Attach a decorative fabric panel for an extra touch of flair. Use some strong adhesive or staple it onto the gate.
Pro Tip
Consider reinforcing the pallets with some extra wood pieces on the back if your pup is particularly rambunctious.
No shame in ensuring your gate can withstand a bit of excitement. Safety first, fun second, right? Additionally, investing in a luxury indoor dog gate can complement your handmade solution while offering a stylish and durable option for your home.
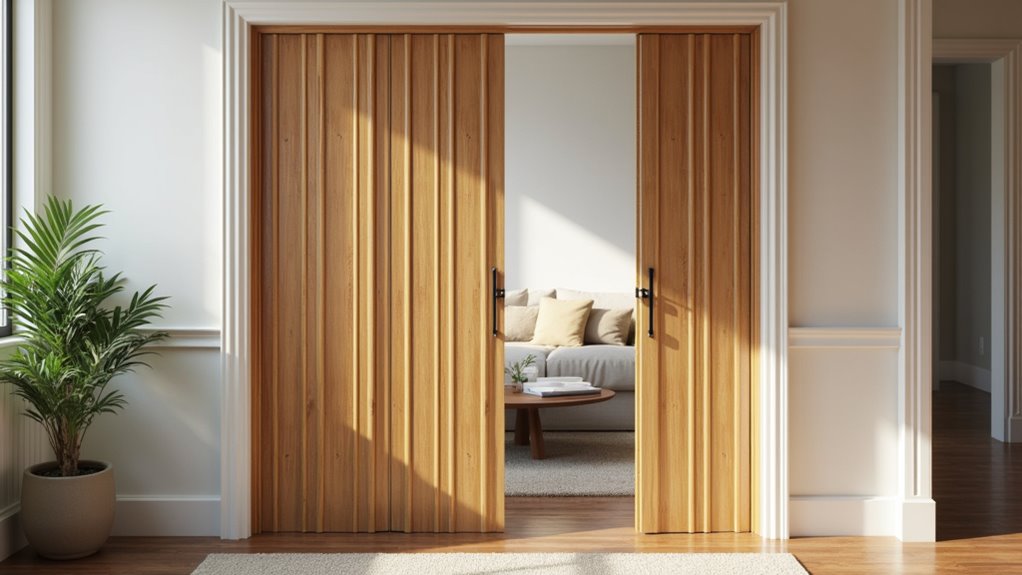
2. Sliding Barn Door Gate
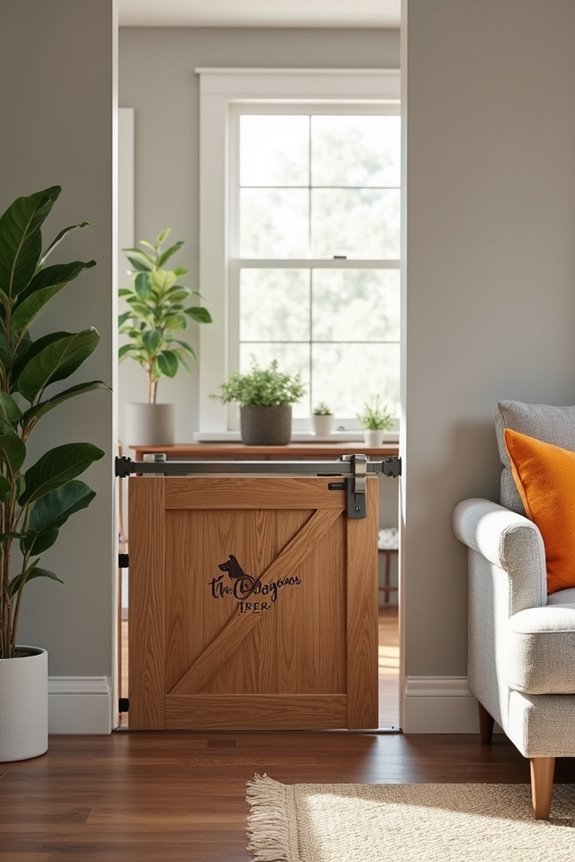
Looking for a trendy and practical way to keep your pup contained? A sliding barn door gate might just be the perfect solution. Not only does it save on space—because it slides instead of swinging—but it also adds a rustic charm to your home.
With just a few materials and some simple steps, you can create a stylish barrier that complements your décor and keeps your furry friend safe. For those who prefer ready-made options, there are also various premium dog gates indoor that can provide a similar aesthetic with ease.
Materials Needed
- 1 wooden board (size depends on your doorway)
- 2 sliding door track rails (length of your gate’s width)
- 4 track rollers (2 on each rail)
- 2 L-brackets (for attaching the track to the wall)
- Gate latch (to secure the gate)
- Sandpaper or a sanding block
- Wood stain or paint (optional)
- Paintbrush (if staining/painting)
- Drill and drill bits
- Screwdriver
- Measuring tape
- Safety goggles
- Work gloves
Step-by-Step Instructions
- Measure Your Doorway: First things first, measure the width and height of your doorway to decide how big your barn door gate will be. A width of about 30 inches and a height of around 28 inches generally does the job, but make adjustments based on your needs.
- Cut the Wood: Using a saw, cut your wooden board to the desired size. If you’re anything like me, this is the moment you realize just how much measuring can go wrong if you’re not paying attention. Don’t worry too much; wood can be forgiving if you’re creative.
- Sand It Smooth: Take your sandpaper and give that wood a nice smooth finish. There’s nothing worse than a semi-smooth surface giving your dog a splinter-filled surprise.
- Stain or Paint (if desired): If you want to add some personality to your gate, now’s the time to apply stain or paint. Get your paintbrush ready, let your creativity run wild, and then let it dry completely. You can even ask your kids to help out—just maybe keep the pink paint for another project.
- Attach the Track Rails: Fix those sliding door track rails to the wall where the top of your gate will hang. Make sure you use the L-brackets for added support. You don’t want your beautiful gate crashing down on your dog (or yourself).
- Hang the Gate: Attach the track rollers to the top of the gate (you’ll find nice little spots to screw them in). After that, slide your gate onto the track. Go ahead, give it a gentle push. Isn’t it satisfying when things work just right?
- Secure the Latch: Finally, install your gate latch on the bottom of your sliding gate. This way, when you close it, you can confidently keep your curious dog confined while knowing they’re safe.
Now, spend some time testing it, and make any adjustments needed. Think of it as an opportunity for bonding time with your new creation.
Optional Add-ons/Variations
- Personalized Stencil: Want to make it uniquely yours? Try using a stencil to add your dog’s name or a fun design on the gate. Just imagine the compliments you’ll get from your friends—and the confused looks from your dog.
- Different Color Schemes: Feeling bold? Use bright colors to match your home’s décor or go for a trendy farmhouse whitewash look for a more classic feel. The options are endless, and it can be a fun way to express yourself.
Pro Tip
Always use safety goggles when drilling and cutting. You might think you’re invincible—trust me, I’ve tried—but a little protection goes a long way.
Also, consider investing in a strong barn door track system; it’ll save you headaches down the road and keep your sliding gate in perfect working order. You’ll be the proud owner of a beautifully functional sliding barn door gate, while your furry friend stays happily contained.
Go ahead, give yourself a well-deserved pat on the back.
3. Wrought Iron Decorative Gate

When it comes to adding a touch of elegance to your home while keeping your furry friend safely contained, a wrought iron decorative gate can be a showstopper. Not only does it provide a sturdy barrier, but it also elevates your space with a chic, sophisticated charm. Plus, pairing it with a luxury dog recovery collar can ensure that your pet is both safe and stylish during their recovery process.
Think of it as an investment in both safety and style—what pup wouldn’t appreciate the chance to trot around their own little castle?
Materials Needed
- Wrought iron gate frame (pre-made or custom-made)
- Hinges (two for the side you want to attach to the wall)
- Gate latch (for keeping the gate secured)
- Screws (compatible with your wall type)
- Paint or rust-proof finish (optional)
- Drill with appropriate drill bits
- Screwdriver
- Level (to guarantee your gate hangs straight)
- Safety goggles
- Work gloves
Step-by-Step Instructions
1. Choose Your Location: First up, decide where you want to install your decorative gate. Make sure it’s a spot where you can easily and safely confine your dog, like at the entrance of a hallway or a living area.
This is the part where you get to be the doggie traffic cop.
2. Measure the Opening: Use a tape measure to find out how wide and tall the gate needs to be. This will help you know if you need a custom-made gate or if a pre-made one will fit your needs.
Trust me; there’s nothing worse than guessing and ending up with a gate that’s too tall or too short.
3. Attach the Hinges: Once you have the gate, position it against the wall where you want to install it. Mark where the hinges will go, about 6 inches from the top and bottom of the gate.
Using your drill, affix the hinges to the wall first. Remember to use your level to guarantee the gate hangs straight; we don’t want the dog thinking they need to perform acrobatics to get through.
4. Hang the Gate: After securing the hinges to the wall, lift the gate and attach it to the hinges.
This step is super vital, so maybe don’t try to hold the gate and juggle a cup of coffee at the same time. Once it’s on, check that it swings freely and fits snugly in the opening.
5. Install the Latch: Now, it’s time to add your gate latch on the opposite side of where the hinges are. Mark where it’ll go, drill, and attach it firmly.
This way, your curious pup is less likely to engineer an escape plan.
6. Optional Finishing Touches: If you want to give your gate a personal touch, think about painting it or adding a rust-proof finish for extra durability.
Just make sure to let it dry completely before letting your pup investigate.
7. Test It Out: Now that your gate is up, take a moment to admire your handiwork. Give it a gentle push, close it, and make sure that everything is secure.
Then, introduce your pooch to their new gate.
Optional Add-ons/Variations
– Paint It: Want to make it pop? Consider painting your wrought iron gate in a fun color that matches your decor.
Maybe even go for a funky pattern or use stencils for a more artistic feel. Who said gates can’t be fashion statements?
– Add Decor: Consider attaching fairy lights or greenery to the gate for a whimsical touch.
Your pup may not appreciate the aesthetic, but you’ll certainly love it.
Pro Tip
When working with metal gates, always wear gloves and safety goggles, especially when drilling or painting.
Also, consider using a gate that has a locking mechanism if your pup is a clever escape artist. A little extra security goes a long way in giving you peace of mind.
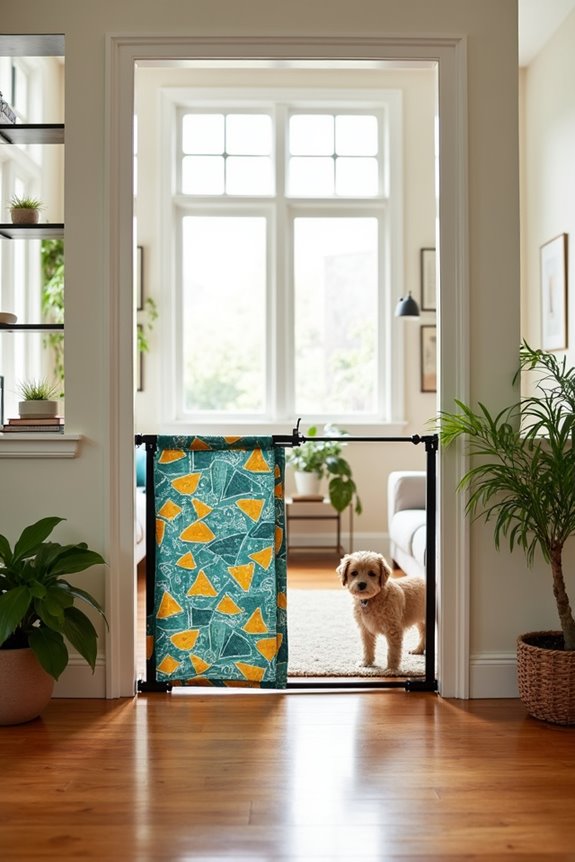
4. Customizable Fabric Dog Gate
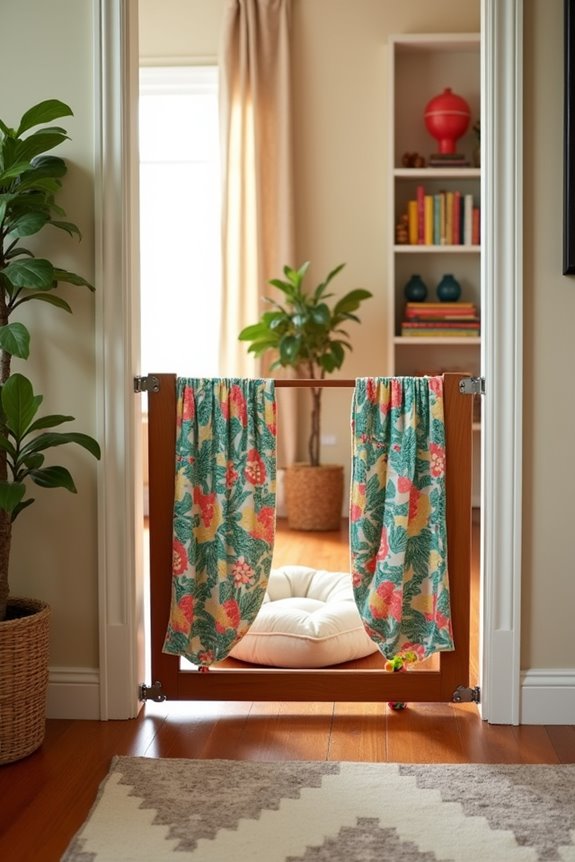
Let’s be honest: who doesn’t love a bit of flair in their home? A customizable fabric dog gate not only serves as a reliable barrier for your four-legged companion, but it also adds a fun pop of personality to your space. Tailoring it to match your decor makes it feel like a natural part of your home rather than a clunky afterthought. Plus, it’s a cost-effective solution, especially if you’ve been eyeing those pricey decorative gates in stores. Furthermore, your dog will appreciate luxurious dog gifts that make their space even more inviting and comfortable.
Materials Needed
- A tension rod or wooden frame (your choice!)
- Fabric of your choice (think fun patterns or colors)
- Sewing machine or fabric glue
- Measuring tape
- Scissors
- Curtain clips (if using a tension rod)
- Optional: Velcro strips for easy removal
- Optional: decorative trim or ribbon for extra pizzazz
Step-by-Step Instructions
- Measure Your Space: Start by measuring the width of the space where you want to place your dog gate. This will help you determine how long your fabric should be. It’s like measuring for jeans; get it right, and you’ll look great—get it wrong, and well, let’s just not go there.
- Choose Your Fabric: Head to your local fabric store or browse online to find something that speaks to you. Think of prints and colors that match your style while still being dog-friendly. Avoid fabrics that snag easily—let’s keep the drama to a minimum, shall we?
- Cut the Fabric: Once you’ve settled on your fabric, cut it to the desired length. Aim for a piece that’s about a foot taller than the height of your chosen gate for some extra flair. Think of it as your gate’s elegant cape.
- Sew or Glue the Edges: To prevent fraying, fold the edges of the fabric and either sew them down or use fabric glue. If you’re anything like me and can barely sew a button, fabric glue might be your best friend here. Just keep your hands away from any fabric that’s still wet—no need for an adhesive adventure.
- Attach the Fabric to Your Frame: If using a tension rod, slide the fabric through the rod and secure it with curtain clips. If you opted for a frame, simply attach the fabric using Velcro strips or staples. Just make sure it’s secure. You wouldn’t want your pup thinking it’s okay to pull a “magic trick” and tear down the gate.
- Install the Custom Gate: Position your completed fabric gate in your desired location. If you’re using a tension rod, simply place it in the entryway. If it’s a frame, secure it with brackets or nails. Make sure it stands firm—your dog should think of it as an impassable wall, not a suggestion.
- Test It Out: Finally, let your pup investigate their new boundary. Verify it opens and closes smoothly, and adjust if necessary. Consider yourself the proud designer of your dog’s new chic separation space.
Optional Add-ons/Variations
Want to take your fabric gate to the next level? Try adding some decorative trim or a fun ribbon down the sides for an extra touch of style. If you’re feeling adventurous, you can even switch up the fabric seasonally or for special occasions. Imagine a holiday-themed gate for the festivities—your dog’s space just became the hottest spot in the house!
Pro Tip
When choosing fabric, make sure it’s machine-washable (you know, just in case of messy moments). This way, you can keep your gate looking fresh and lively, turning laundry day into an easy maintenance routine.
And don’t forget: using Velcro makes it super easy to detach and wash when your pooch decides it’s time for snack time near the gate.
Creating this fashionable yet functional dog gate combines necessity with style, giving you peace of mind and your pup a fashionable space. How’s that for a win-win?
5. Expandable Tension Rod Gate
If you’re a dog owner, you know how important it’s to create safe spaces for your furry friends while still keeping your home stylish. An expandable tension rod gate is a simple yet effective solution—it provides a barrier to keep your pup in or out of spaces, and it blends seamlessly into your decor. Plus, it’s budget-friendly, making it a win-win for both your wallet and your home. Furthermore, consider incorporating luxury cat furniture into your home’s aesthetic for a truly upscale environment that offers comfort for all your pets.
Materials Needed
- Expandable tension rod (available at any home goods store)
- Fabric or lattice panel (to match your style)
- Hooks (if needed, for hanging)
- Measuring tape
- Scissors
- Optional: decorative paint or stickers to customize the panel
Step-by-Step Instructions
- Measure the Space: Grab your measuring tape and figure out the width of the doorway or area you want to block. That number will help you select the right size tension rod. Measure twice, cut once—err, I mean, buy right.
- Choose Your Panel: Pick out a fabric or lattice panel that complements your decor. If you want something fun, consider a colorful fabric. Want it sleek? A lattice panel could do the trick. Just make sure it’s sturdy enough to withstand your pup’s curiosity.
- Adjust the Rod: Set your expandable tension rod to the correct length based on your measurements. You want a snug fit, but not so tight that it’s a wrestling match to put it in place.
- Attach the Panel: If you’re using fabric, drape and secure it onto the rod; if it’s a lattice, you can either hook it directly or use twine to tie it on for a rustic feel. Just be sure it’s sturdy enough so your pup doesn’t think it’s a jumping contest.
- Install the Gate: Place the tension rod in the doorway, making sure it fits securely. It might feel like you’re playing a game of Jenga, but once it’s in, the gate should hold its ground.
- Test It Out: Open and close the gate a couple of times. You want to confirm everything is working as it should. A little nudge should do it—don’t go all Hulk on it. We don’t want any broken home decor here.
Optional Add-ons/Variations
- Get creative with your fabric. Use bright colors or funky patterns that reflect your personal style. Remember, it’s your home—make it yours.
- If you want to go all out, why not embellish the lattice panel? A coat of paint or some fun stickers can add a unique flair your visitors will adore.
Pro Tip
For added durability, consider using a tension rod that can hold extra weight. If you know your pup tends to push or lean against gates, going for a sturdier option can save you a headache later.
And always check for loose screws or fittings after a few weeks to keep things safe and sound.
Now you’ve got an expandable tension rod gate that not only keeps your pup safe but also looks chic in your space. How delightful is that? Get ready to enjoy both style and functionality while saying goodbye to unwanted puppy mischief.
6. Glass Pet Barrier Panel
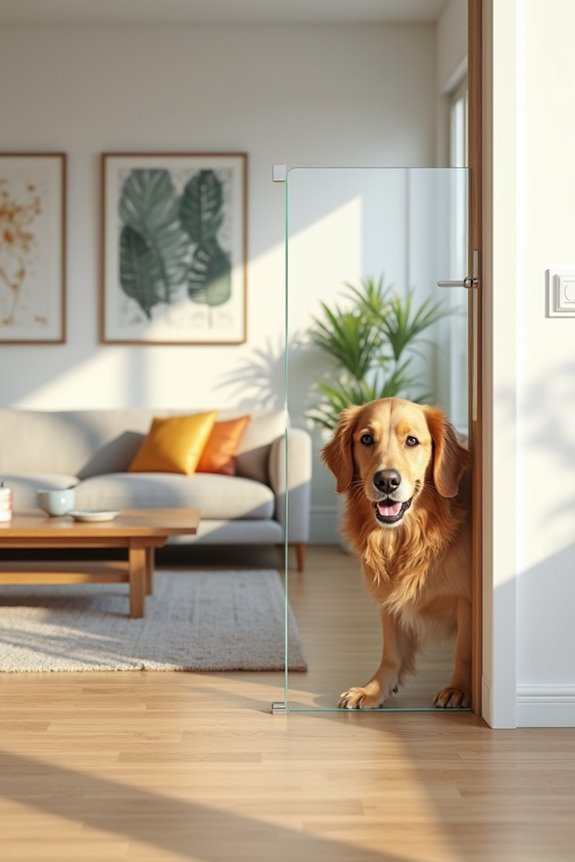
If you’re looking for a stylish and modern solution to keep your dog safe at home without obstructing your view, a glass pet barrier panel could be just what you need. Not only does this project enhance your home aesthetics, but it also provides a strong, clear barrier that adds a touch of elegance to your space. Plus, it saves you from spending on pricey alternatives.
Materials Needed
- Glass panel (custom-sized or pre-cut)
- Two glass clamps (to secure the panel)
- Silicone adhesive (for extra stability)
- Measuring tape
- Level
- Screwdriver
- Optional: rubber pads for the base (to protect flooring)
Step-by-Step Instructions
- Measure the Area: Use your measuring tape to find out how high and wide you want your glass barrier. Do you want it to be a statement piece or a discreet safety solution? Measure twice to avoid any miscalculations—nobody wants a glass mishap.
- Choose Your Glass: Head to your local hardware or glass shop to choose the right glass panel. Tempered glass is ideal because it’s durable and safe. If the thought of cutting glass gives you the shivers, pre-cut options are great, too.
- Install Glass Clamps: Mark where you want to install the glass clamps on the wall or floor. Use your level to guarantee they’re straight because a wonky barrier is just not a good look. Secure the clamps using your screwdriver, and make sure they’re tightly fastened.
- Adhere the Glass Panel: Carefully place the glass panel into the clamps. If you’re feeling a bit clumsy, have a friend hold it in place for you—trust me, you don’t want it slipping. Apply a small amount of silicone adhesive around the base for added stability. This will give the panel a secure hold and make you feel more at ease knowing it’s not going anywhere.
- Check Your Work: Stand back and admire your handiwork. Does it look level? Wiggle the panel a bit—if it’s stable and looks good, you’re all set. If needed, adjust the clamps or the silicone until you’re satisfied.
Optional Add-ons/Variations
- If you want to add a bit of flair, consider looking into frosted or tinted glass for a unique effect. It can create a cool ambiance while keeping your furry friend in check.
- Thinking about a more rustic vibe? You can frame the glass panel with wood; just make sure it’s sturdy enough to support the weight of the glass.
Pro Tip
Always prioritize safety, especially when working with glass. If your dog is on the adventurous side, make sure the edges of the glass are well-finished to avoid any sharp corners.
And take your time—there’s no rush when it comes to installing something that will keep your puppy safe. Plus, a little patience might even inspire some masterpiece level craftsmanship.
7. Natural Bamboo Folding Gate
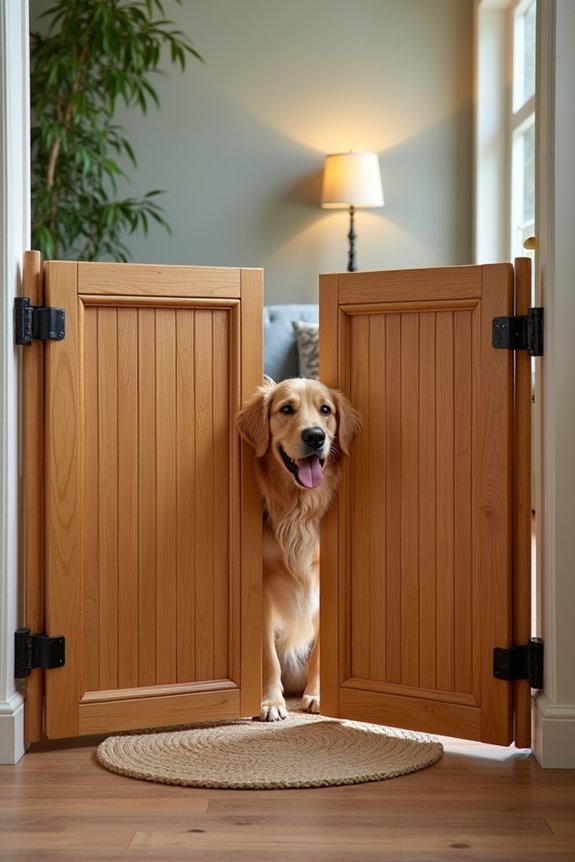
If you’re a dog owner looking for a stylish yet functional way to keep your furry friend contained, a natural bamboo folding gate could be your new best friend. Not only does it provide a safe barrier to keep your pup in check, but it also adds a touch of warmth and charm to your home decor. Plus, making it yourself can save you some bucks while letting your creativity shine.
Materials Needed
- Bamboo strips or bamboo fencing panels
- Wood hinges
- Screws
- Sandpaper (fine grit)
- Wood glue
- Measuring tape
- Saw (if cutting bamboo strips)
- Drill
- Optional: wood stain or sealant for finishing touches
Step-by-Step Instructions
- Measure the Space: First things first, grab that measuring tape. Measure where you want the gate to go. Think about how wide and tall you want it—this is your chance to find that perfect fit for your doorway or hallway.
- Cut the Bamboo: If you’re using long bamboo strips, make sure to cut them to size based on your measurements. A saw will do the trick. Don’t stress if they aren’t perfectly straight. It adds character, right? Sand down any rough edges to avoid splinters, both for you and your dog.
- Assemble the Panels: Lay out your bamboo strips side by side to create two or three connected panels. Use wood glue to attach the pieces together, ensuring they’re aligned and tightly fitting. Let it dry according to the glue’s instructions to avoid any sneaky mishaps later on.
- Attach the Hinges: Once your panels are dry, it’s time to give the gate some mobility. Attach the wood hinges to the side of your gate that will connect to the wall or door frame. Make sure they’re level and secure. A drill will make this easier, but be careful—no one wants an unexpected trip to the hardware store for more screws.
- Install and Adjust: Secure the other side of the hinges to the wall or door frame. Check that your gate swings nicely and isn’t too wobbly. It should open and close smoothly. If it’s leaning a bit, adjust the hinges or add some felt pads under the base for extra stability.
- Finishing Touches: If you want to take your gate to the next level, now’s the time to apply some wood stain or sealant. A little color can really make it pop and protect the wood from wear and tear. Just remember to let it dry completely.
Optional Add-ons/Variations
- Want to jazz it up a bit? Consider painting your bamboo strips in a fun color to match your home décor. Who said gates can’t be a statement piece?
- If you’re feeling crafty, you could even add decorative elements like stencils or painted paw prints to give it that personal touch.
Pro Tip
Always use kid-friendly, pet-safe finishes if you’re staining or sealing your gate. Your dog’s safety should be priority number one—no one wants their pooch munching on harmful chemicals.
Plus, it keeps your conscience nice and clear while you admire your beautiful handiwork.
Extra Tips & Ideas
While building a DIY dog gate might seem like just another chore on your to-do list, it’s actually a fun project that adds a unique touch to your home—plus, it helps keep your furry friend safe and sound.
To elevate your gate game, consider painting it in a playful color or adding fun decals. If your pup is a jumper, make sure to secure it properly; you wouldn’t want them taking an unexpected leap!
For those crafty types, think about incorporating shelves on either side for doggy treats or toys.
And hey, if you mess up—just call it ‘rustic charm.’ Your gate doesn’t have to be perfect; it just needs to work.
Enjoy that creativity flowing, and your pet will appreciate your efforts too!
Frequently Asked Questions
What Materials Are Best for Building a DIY Dog Gate?
You’ll want strong materials like wood, PVC, or metal for a durable DIY dog gate. These options provide stability and can withstand your dog’s activity while ensuring safety and functionality in your space.
How Can I Ensure My Dog Won’t Escape the Gate?
To guarantee your dog won’t escape the gate, choose sturdy materials, secure hinges, and add a latch they can’t easily manipulate. Regularly check for wear, and always supervise your dog when it’s nearby.
Are There Any Budget-Friendly Options for DIY Dog Gates?
Consider using old pallets as sturdy, budget-friendly dog gates. They symbolize resilience and creativity, transforming your space with rustic charm. Just add hinges, some paint, and you’ll have a functional gate without breaking the bank.
How Do I Measure for an Accurate Gate Size?
To measure for an accurate gate size, start by measuring the width of the opening and the height needed. Subtract a few inches for clearance, and guarantee it fits snugly but opens easily.
Can I Attach a Dog Gate to an Existing Wall?
Yes, you can attach a dog gate to an existing wall like hanging a painting. Just make certain you use the right anchors and screws for stability, so your gate stays secure while keeping your furry friend safe.
Conclusion
In the end, building your own dog gate can really spruce up your space and keep your furry friend safe. Remember, “Home is where the dog hair sticks to everything but the dog.” So, why not make it stylish too? Whether you go with a chic sliding barn door or a simple wooden pallet, you’re sure to find joy in the process. So roll up your sleeves, grab those tools, and let’s get this project underway. You’ve got this!