Picture your pup strutting in a taco costume, complete with adorable toppings—how cute would that be? Turning your dog into a quirky character can be both fun and a little hilarious. Ever tried making a pirate outfit with just a few old clothes? It’s easier than you think. So, if you’re ready to give your furry friend a makeover that’ll make everyone smile, stick around for some pawsitively delightful ideas.
Costume Ideas for Every Breed
When it comes to dressing up your furry friend, finding the perfect costume for their breed can feel like a delightful adventure.
Picture a tiny Chihuahua as a taco or a fluffy Golden Retriever as a lion—it’s pure joy. DIY dog costumes are a fantastic way to showcase your pup’s personality.
If you’ve got a Dachshund, why not craft a hotdog bun out of brown fleece? And if you own a Corgi, their short legs make them ideal for a bumblebee costume, complete with little wings!
Just imagine the fun of creating a pirate outfit for your terrier, complete with a miniature hat. You’ll spend hours pulling it together, but isn’t that half the fun?
Your dog will appreciate the attention—and snacks—along the way.
Our Collection
When it comes to dressing up your pup, you’re in for a treat with our collection.
Picture your furry friend sporting a superhero cape and mask, or maybe a pirate hat with an eye patch—imagine the adorable photos you’ll snag.
From bumblebee wings to a classy tuxedo with a bow tie, there’s something in here for every personality and occasion, so let’s get those tails wagging!
1. Superhero Cape and Mask
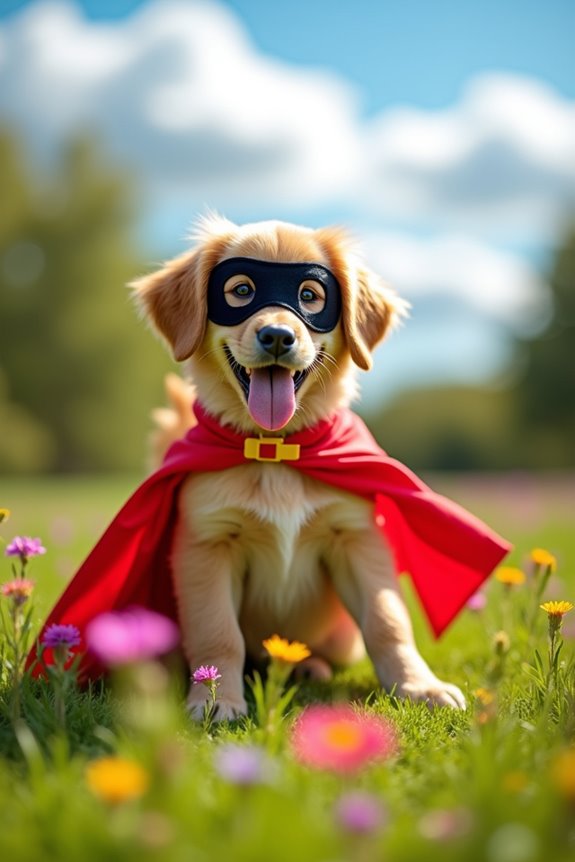
Does your pup dream of saving the day? With this DIY superhero cape and mask, you can transform your furry friend into the ultimate protector of your neighborhood. It’s a fun, budget-friendly project that not only keeps your dog comfortable but also makes for some epic photo sessions. Plus, with premium dog training equipment available, you can ensure your pet is both stylish and well-prepared for their adventures.
Plus, your pet will be the coolest hero at the park, fetching compliments from fellow dog owners.
Materials Needed:
- 1 yard of fabric (preferably lightweight, like cotton or fleece)
- Fabric scissors
- Sewing machine or fabric glue (whichever you’re comfortable with)
- Measuring tape
- Velcro strips or buttons (for fastening the cape)
- 1 sheet of felt (for the mask)
- Elastic band (for the mask)
- Decorative embellishments (like glitter, sequins, or fabric paint) – totally optional, but fun
- Dog’s collar (to measure for the cape)
Step-by-Step Instructions:
- Measure Your Dog: Start by measuring the length from your dog’s collar to the spot you want the cape to end. Remember, every superhero needs a cape that doesn’t trip them up. Write that number down.
- Cut the Fabric: Fold your chosen fabric in half and cut a rectangular shape according to the measurement you took. A good starting size is about 24 inches wide and the length you measured. Remember, you can always cut more, but fabric doesn’t grow back.
- Create the Neck Opening: At one end of the rectangle, cut a small semi-circle or oval for the neck opening. This should be just wide enough for your dog’s collar to fit through or a little snugger if you’re using Velcro for fastening.
- Hem the Edges: If you’re fancy and want a cleaner look, hem the edges of the fabric using a sewing machine or fabric glue. No judgment here if you choose glue; we all have different superpowers.
- Add the Fastening: Sew or glue Velcro strips at the collar area or attach buttons to secure the cape on your pup while they’re in action. Just make sure it’s comfy and not cutting into their fur.
- Make the Mask: Cut two eye shapes from the felt equal in size. Use the elastic band to create the mask, making it long enough to hold up nicely on your dog’s face. Glue or sew the eye cutouts onto the felt base.
- Attach the Elastic: Use glue to attach one end of the elastic to each side of the felt mask. Make sure it’s snug but not too tight around your dog’s head. Your furry friend has to see where they’re flying, after all!
Optional Add-ons/Variations:
- Add a Cape Design: Personalize the cape with your dog’s name or a superhero logo using fabric paint or iron-on patches. This can make for a super unique look.
- Customize with Colors: Use themed colors based on your pet’s favorite comic book hero—nothing says “fabulous” like a bright red cape with blue details!
Pro Tip:
Before finalizing everything, let your dog wear the cape for a short while to verify it’s comfortable. If they seem to be struggling, adjust the fit or the fastening.
Remember, a happy superhero is a heroic one!
Now, all that’s left is to release your newly costumed hero upon the world. Your pup’s adventures have just begun. Who knows, you may even earn the reputation as the best dog costume designer in the neighborhood. Or at least the most fun one. Happy crafting!
2. Pirate Hat and Eye Patch
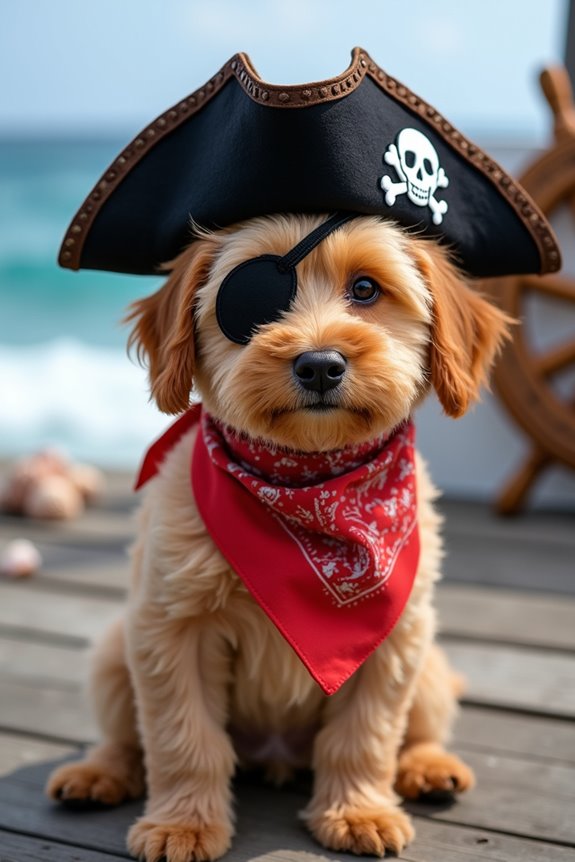
Ahoy, matey! If your furry friend has ever daydreamed of sailing the seven seas in search of treasure, this DIY pirate hat and eye patch will transform them into the cutest swashbuckler on the block. Not only is this a fun project for dog owners, but it also saves money compared to store-bought costumes — and let’s be real, your pup will be the star of every doggy dress-up party or Halloween gathering. Plus, it’s essential to ensure your dog is nourished with premium dog food tailored for their breed to keep them energetic for all those swashbuckling adventures!
Materials Needed:
- Black felt (or any piratey color you prefer)
- Scissors
- Hot glue gun and glue sticks (or fabric glue, if you’re feeling ambitious)
- Measuring tape
- Cardboard (a sturdy old box will do)
- Elastic band (to keep the eye patch in place)
- Bandana (optional, for a complete pirate look)
- Decorative embellishments (like beads or feathers — let your creativity run wild!)
Step-by-Step Instructions:
- Measure for the Hat: Measure the circumference of your dog’s head. It’s essential to make sure the hat fits just right, snug enough to stay on during adventures, but not so tight that it leaves an impression.
- Create the Hat Shape: Cut a large semi-circle from the black felt. The diameter should be about twice the measurement of your dog’s head. Fold the felt in half to make sure both sides are symmetrical, then keep the fold and cut up about 5 inches from the base, creating a point at the top — think classic pirate hat shape.
- Cut the Brim: For the brim, cut out a circle that’s larger than the head size, about 24 inches in diameter. Then cut a smaller circle in the middle of it to create a donut shape, large enough for your dog’s head to fit through.
- Assemble the Hat: Use the hot glue to attach the semi-circle to the brim, forming a cone shape. Make sure the glue is cool enough before trying on the hat — puppy patience can wear thin.
- Make the Eye Patch: Cut a small oval piece from the cardboard, about 3 x 5 inches. Cover one side with black felt, secure it with glue, and leave the other side natural for a little texture. Poke holes on either side to attach the elastic.
- Attach the Elastic: Cut a piece of elastic long enough to hold the eye patch over your dog’s eye (usually about 12-14 inches). Thread it through the holes and tie tight knots. Test it on your pup, making sure it’s snug, but not uncomfortably tight.
- Complete the Look: If you’re feeling extra adventurous, tie a bandana around their neck for that classic pirate ensemble. Now your pup is ready to hit the doggy high seas.
Optional Add-ons/Variations:
- Go bold with different colors of felt for the hat or add skull-and-crossbones decals for fun flair.
- For a more elaborate costume, consider adding a small belt made from fabric and a toy sword tucked into it for some flair.
Pro Tip:
Always make sure your dog is comfortable wearing their new costume. Adjust the eye patch so it doesn’t hinder their vision, and take short breaks if they seem a bit unsure.
3. Bumblebee Wings and Antenna
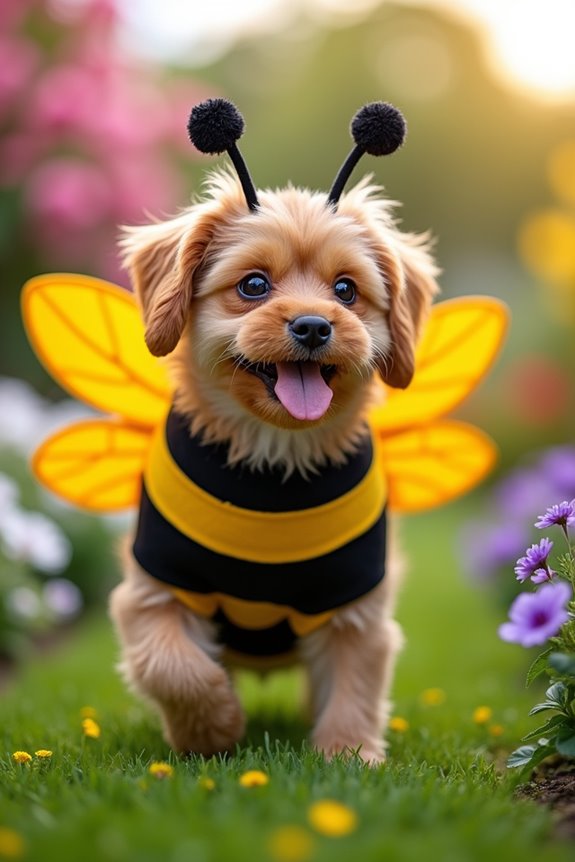
Buzzing into a costume as adorable as a bee is simple and fun with these DIY bumblebee wings and antenna. This project is perfect for dog owners who want to give their pups a playful look without breaking the bank. Not only will your furry friend look absolutely cute, but you’ll also have a blast crafting, and let’s face it, who doesn’t love a happy little bee buzzing around? Plus, what’s even better is you can treat your dog to some homemade snacks while you craft their costume, using a premium dog treat maker for fresh, tasty treats.
Materials Needed:
- Yellow felt (or fabric in any shade of yellow you fancy)
- Black felt for stripes
- Wire hanger or craft wire (this will keep the wings sturdy)
- Black elastic or ribbon (to hold wings in place)
- Hot glue gun and glue sticks
- Scissors
- Measuring tape
- Headband (for the antenna)
- Black pom-poms or small balls (for antenna tips)
Step-by-Step Instructions:
- Measure and Cut Wing Shape: Measure out two large wings, about 12 to 15 inches across for larger dogs (adjust based on your pup’s size). Sketch a wing shape on yellow felt and cut it out. Repeat for the second wing.
- Create Stripes: Cut strips from the black felt for the bee stripes. Lay them across the yellow wings, gluing them down securely with your hot glue gun. Stripes can be as thick or thin as you want; bees have their own style too.
- Bend the Wire Hanger: Uncoil the wire hanger and bend it into a wing shape, forming a frame that mimics the outline of your felt wings. Make sure it’s sturdy enough to hold your wings but flexible enough to attach to the body.
- Attach Wings to the Frame: Use the hot glue to affix the felt wings to the wire frame. You can even add a layer of yellow tulle on top for a delicate effect.
- Prepare for Attachment: Take the black elastic or ribbon and cut two lengths long enough to secure around your dog’s body. Glue these to the bottom of each wing frame, making a little loop for your dog to slip into comfortably.
- Make the Antenna: For the antenna, take a plain headband and glue the black pom-poms to the ends of two small pieces of craft wire. Then, attach the wires to the headband, bending them to create a bee-like effect.
- Dress Your Dog: Slip the wings around your dog’s body, securing them with the elastic or ribbon, then place the headband with antenna on their head. Get ready for a cuteness overload!
Optional Add-ons/Variations:
For a whimsical twist, consider using glittery felt for the wings. Or, try sewing a small flower to the wings for a garden-like effect. Why not even add a few small bee stickers for extra charm? The world’s your oyster, so let your creativity soar.
Pro Tip:
When fitting the wings, keep comfort in mind. Make sure they’re snug but not too tight. A little wiggle room allows your pup to run and play without fuss. And always supervise costume wearing during playtime to guarantee safety and comfort.
Now it’s time to grab those materials and get buzzing! Your dog is sure to be the bee’s knees at the next costume party.
4. Witch Hat and Broomstick
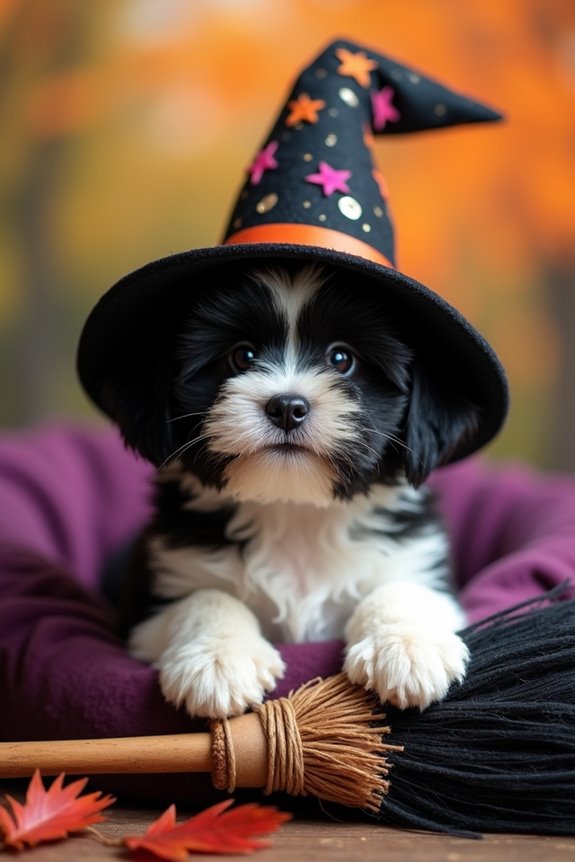
Transform your pooch into the cutest little witch on the block with this playful DIY project! Crafting a witch hat and broomstick for your dog not only tickles the imagination but also adds a delightful twist to any festive gathering. Plus, it saves you money compared to those pricey ready-made costumes, and your furry friend will be all set for Halloween fun without compromising on comfort. Luxury dog beds elevate the comfort of your pet, ensuring they relax between their spellbinding adventures.
Materials Needed:
- Black felt (or any dark fabric for that mysterious vibe)
- Cardboard (for a sturdy broomstick)
- Scissors
- Hot glue gun and glue sticks
- Elastic band or fabric headband (for securing the hat)
- Twine or ribbons (to make broomstick details)
- Measuring tape
- Optional embellishments (like glitter, stars, or spooky stickers)
Step-by-Step Instructions:
- Create the Hat Base: Cut a large circle out of black felt, about 12 inches in diameter for larger dogs (smaller for little pups). This will be the top of the hat. Then, cut a smaller circle in the center, around 2-4 inches, to fit snugly onto your dog’s head.
- Form the Hat Cone: Cut a triangle from the felt using the larger circle for reference, shaping the triangle into a cone that will point up. Confirm the base of the cone fits snugly into the smaller hole of the circle while leaving room for comfort.
- Glue the Hat Together: Use your hot glue gun to glue the edges of the cone to the larger circle, forming a classic witch’s hat. You might want to have a snack while you let it dry—hot glue can get a bit sticky.
- Secure the Hat: Cut your elastic band or fabric headband to size and attach it inside the hat with hot glue. This will help keep the hat in place when your pup does that adorable “zoomie” thing. Trust me, it happens.
- Make the Broomstick: Grab the cardboard and cut it into a long rectangle, about 2 feet in length for larger dogs. For the broom head, cut a small square, around 4 inches, and fray the edges to create that classic broom look.
- Assemble the Broomstick: Use hot glue to attach the frayed square to one end of the cardboard rectangle, with twine or ribbons to wrap the broom head and give it a rustic charm. Now, you’ll be wishing you’d a real broomstick so you can join the witching fun.
- Dress Your Dog: Place the hat gently on your dog’s head and adjust it as needed. Hold the broomstick (either have your pup ‘carry it’ or position it next to them for that perfect photo op) and prepare for adorable witchy antics.
Optional Add-ons/Variations:
Feeling extra creative? Consider adding some sparkling embellishments like glittery stars on the hat or a colorful ribbon on your broomstick. Or, if you’re really feeling bold, switch out the black felt for deep purple or green witches’ robes for a unique twist.
Pro Tip:
Always verify the hat isn’t too heavy or tight on your dog’s head. The last thing you want is your pup to feel uncomfortable or fidgety. Take frequent breaks during your photoshoot, providing treats and lots of praise to make this a fun experience for both of you.
You’re basically creating magical memories together, right?
5. Tuxedo With Bow Tie
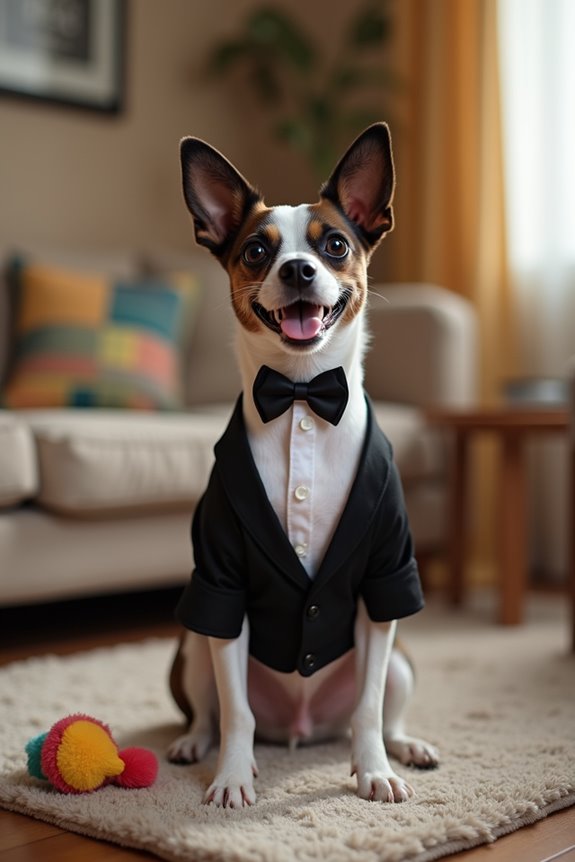
Get ready to elevate your pup’s style with a snazzy DIY tuxedo and bow tie! Not only will your four-legged friend be the most dapper dog at any festive event, but creating this classy outfit is a fantastic way to bond with your pet while saving money. Who needs an overpriced costume when you can whip up a stylish tux that perfectly fits your pooch? Let’s release your creativity and get started!
Materials Needed:
- Black fabric (felt or cotton works well)
- White fabric (for the shirt and bow tie)
- Sewing kit (needle, thread, scissors)
- Measuring tape
- Velcro strips or buttons (for easy wear)
- Paper (for patterns)
- Optional embellishments (like sequins or fabric paint for a personalized touch)
Step-by-Step Instructions:
- Measure Your Pup: Grab your measuring tape and take measurements of your dog’s neck, chest, and back length. This will guarantee your tuxedo fits like a charm and doesn’t restrict their stylish strut.
- Create the Pattern: On paper, sketch out a simple tuxedo shape by drawing a rectangle for the body and a triangle shape for the collar. Make sure to add extra inches for seams. You’ll want a rectangle that’s long enough to cover your dog’s back comfortably, with the collar shaping around the neck.
- Cut the Fabric: Use your pattern to cut out the black fabric for the back and the collar. Next, cut a rectangle out of the white fabric for the shirt front. Don’t stress if it’s not perfect; your pup will rock it anyway.
- Sew the Tuxedo: Place the black rectangle (the body) and the white rectangle (the shirt) together, right sides facing, and sew them along the edges. Remember to leave openings for the front legs—because no one wants a doggie twist party. Turn it inside out for a clean finish.
- Attach the Collar: Time to add some flair! Fold the collar fabric into a shape that fits around your dog’s neck, and sew it onto the neck area of the bodice. Use Velcro or buttons to secure the collar, making it easy to put on and take off.
- Make the Bow Tie: Cut a small piece of black fabric and a slightly smaller piece in white. Fold and sew them together to create a cute bow tie shape. Attach this to your tuxedo where it will stand out and catch all those admiring tails wagging.
- Dress Your Dog: Slip the tuxedo over your dog, adjusting any straps or Velcro for comfort. Confirm your pup can move freely, flaunting that tuxedo with as much confidence as a runway model.
Optional Add-ons/Variations:
Feeling adventurous? Try using a velvet fabric for an even more luxurious tuxedo. You can also swap out black for a vibrant color if you want your pet to stand out in the crowd.
And don’t shy away from adding some sparkle with sequins or fabric paint to create your unique design.
Pro Tip:
To guarantee your pup stays cozy, choose lightweight fabric for warmer months, or layer it with a warm quilted fabric for those chilly autumn evenings. Always check for loose threads or discomfort, and keep a close eye as they strut their stuff in this stylish outfit.
Putting in the effort to create this tuxedo won’t just save you some bucks; you’ll also have a one-of-a-kind costume that your dog will proudly wear! Additionally, keeping your dog’s skin healthy and free of infections will ensure they look their best in this stylish costume.
Plus, you might just find yourself starting a little fashion show in the living room—it’s like Project Runway, but with fewer tears over fabric swatches. Enjoy making memories while dressing up your fancy pup!
6. Dinosaur Spikes and Tail
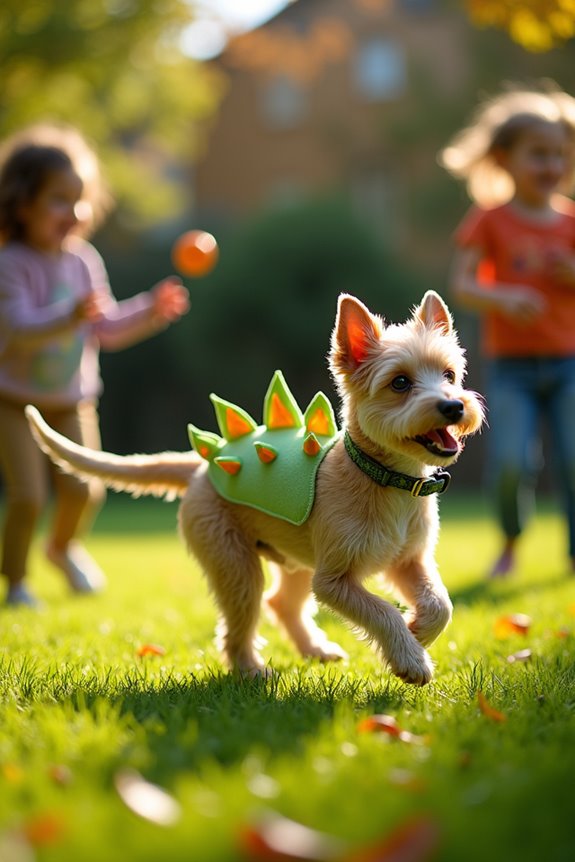
Release your pup’s inner dinosaur with this fun and easy DIY project! Creating dinosaur spikes and a tail for your furry friend not only adds an adorable touch to their costume but also allows you to express your creativity without breaking the bank. This project promises to keep your dog comfortable and looking ferocious—perfect for Halloween, themed parties, or just a great photo op that’s sure to bring smiles all around.
Materials Needed:
- Green felt fabric (or any dino color you like)
- Scissors
- Hot glue gun (and glue sticks)
- Elastic band (or adjustable straps)
- Measuring tape
- Cardboard (for tail structure)
- Marker (for tracing shapes)
Step-by-Step Instructions:
- Measure Your Pup: Start by measuring the length of your dog’s back from neck to tail. This will help you determine how long to make your tail.
- Create the Spikes: Cut out triangles from the green felt, about 4-6 inches tall. You can make as many as you like, usually 5-7 spikes should do the trick for a cute effect. Feel free to get creative with colors—why not add a bright orange to the mix for extra flair?
- Prepare the Tail: Take a piece of cardboard and cut it to a size that will match the back length of your dog. Leave a little extra for tucking into the costume, and create a tail shape, maybe a rounded end if you want a more traditional dino look.
- Cover the Tail: Use green felt to wrap around the cardboard tail. Use the hot glue to secure the felt in place. Make sure it’s attached well so your pup doesn’t end up being part of a DIY project gone wrong.
- Attach the Spikes: Starting from the bottom of the tail, glue the felt triangles (spikes) along the top of the tail. Space them out to mimic how a dinosaur’s spikes might actually be positioned. Let them stand tall and proud—they’re the showstoppers after all.
- Add the Straps: Securely attach an elastic band or adjustable straps to the tail so it can easily be worn by your pet. You want to make sure it’s comfortable, allowing your dog to move freely while still showing off that dino style.
- Dress Your Dino: Slide the tail on and secure it snugly, making sure it doesn’t pinch anywhere. Now you can finish off the look by putting a couple of those spikes around your dog’s collar or harness for an added effect. You’re all set for dino adventure time.
Optional Add-ons/Variations:
Feeling extra inventive? Use different colors of felt for the spikes or try adding some sparkly fabric to make a glimmering dino.
Or, you could create a matching headpiece—small ear shapes with spikes on top—to complete your pet’s prehistoric ensemble. Imagine your dog with a full dino vibe, it’s sure to turn heads at the park.
Pro Tip:
Before starting, make sure your hot glue gun is at the right temperature. Too hot can mean melted fabric and a sad pup; too cool can leave you wrestling with materials. Trust me, I’ve been there.
And keep a close eye on your pooch while they wear their fabulous costume—comfort is key to keep the dinosaur spirit alive without turning it into a dino-dilemma.
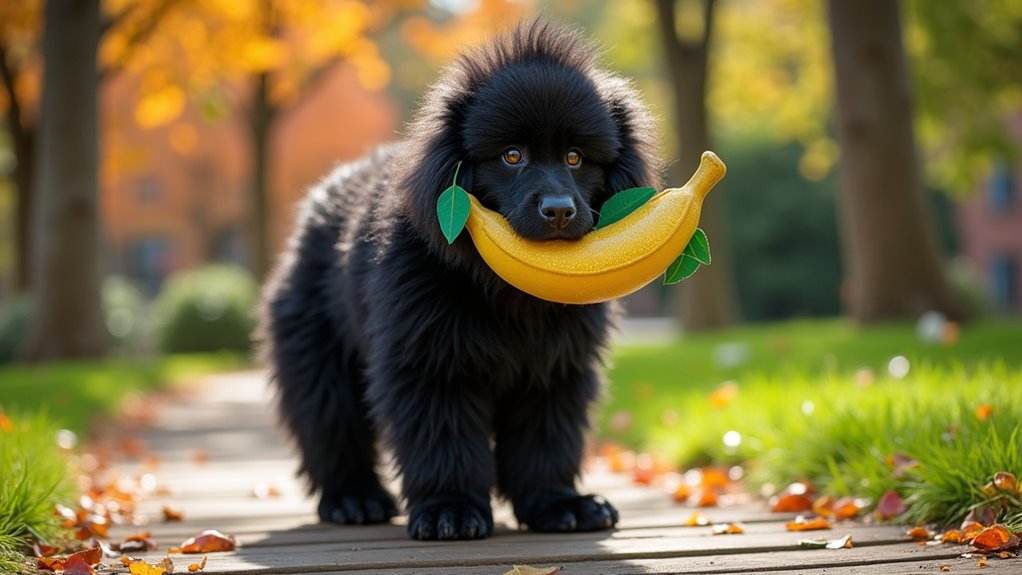
7. Gorilla Suit and Banana
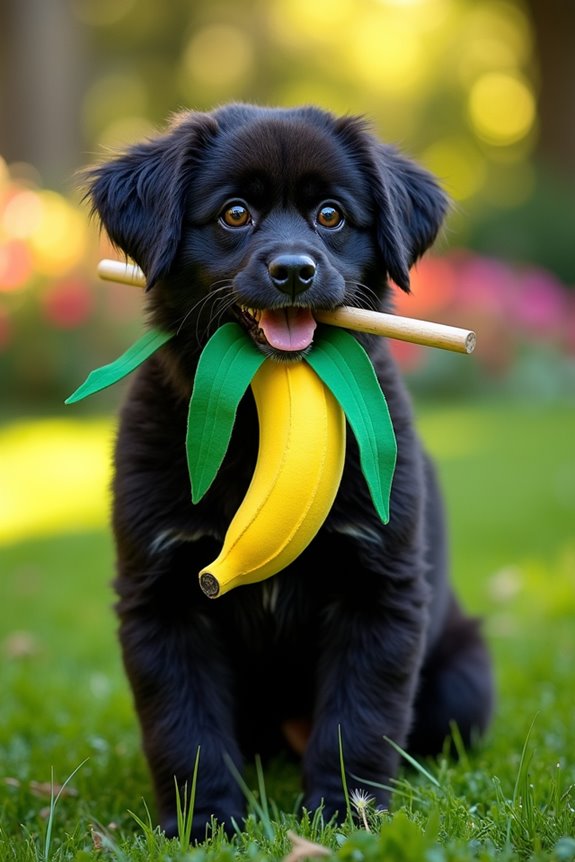
Get ready to release your inner chuckle with this eye-catching DIY gorilla suit for your pooch, complete with a fun banana accessory! This project is perfect for dog owners who want to create an adorable and hilarious costume without breaking the bank—it’s comfy, it showcases your dog’s personality, and it’s guaranteed to bring smiles wherever you go.
Plus, think of all the savings you’ll enjoy from not buying a store-bought costume. So, let’s plunge into transforming your furry friend into the king of the jungle with style!
Materials Needed:
- Black faux fur fabric (the fluffier, the better)
- Black T-shirt (to use as the base of the costume)
- Scissors
- Hot glue gun (and glue sticks)
- Elastic band (or a snugly-fitting collar)
- Brown or yellow felt fabric (for the banana)
- Green felt fabric (for banana leaves)
- Measuring tape
- Wooden stick or chopstick (for banana structure)
Step-by-Step Instructions:
1. Measure Your Pup: First, start by measuring your dog’s body length and chest circumference. This will help you know how much fabric you’ll need to create a cozy gorilla suit.
2. Prepare the T-Shirt: Cut the black T-shirt to fit your dog’s size comfortably. You can cut off the sleeves and the bottom hem to give a more rugged look, but don’t make it too tight; remember, your dog needs to strut their stuff with ease.
3. Cut the Faux Fur: Next, cut patches of the black faux fur. You’ll need various sizes—about 4-6 inch squares and some larger pieces for the back and sides.
The fur will add that ferocious gorilla flair while keeping your pup warm.
4. Attach the Fur: Using your hot glue gun, stick the fur patches onto the T-shirt. Start from the bottom and work your way up so things look nice and layered, kind of like a stylish gorilla shag.
Don’t forget to leave room for your dog’s legs and collar—nothing like a costume malfunction mid-fetch!
5. Create the Banana: Take a piece of brown or yellow felt, and cut it into a banana shape. Use the measuring tape and a little artistic license here—this banana should be comically oversized compared to your dog for full effect.
Glue the wooden stick or chopstick to the felt to give it strength and shape.
6. Add the Leaves: Cut leaf shapes from the green felt and glue them around the base of the banana. This gives your accessory a fun tropical vibe, making it look just like your dog is ready to swing from tree branches or, at the very least, steal a snack.
7. Dress Your Gorilla: Slip the costume on and adjust it for comfort. Then, attach the banana to your pup’s collar with elastic or just let them carry it in their mouth for some extra hilarity.
Watch your furry friend rock that gorilla look.
Optional Add-ons/Variations:
Want to take it a step further? Consider adding some playful accessories! Maybe create a little monkey hat out of the leftover fabric or even throw in a pair of silly oversized sunglasses—who says gorillas can’t be cool?
Pro Tip: Always do a quick comfort check! Confirm that the costume doesn’t restrict your pup’s movement.
Try it on multiple times, adjust as necessary, and keep an eye out for any signs of discomfort. A happy dog makes for a happier Halloween.
Extra Tips & Ideas
Have you ever wondered how to make your dog the star of the costume party? Well, here are some extra tips to elevate your DIY game.
First, consider using your dog’s favorite toy as inspiration. A plush hot dog costume? Genius, right?
Also, don’t shy away from accessories. A silly hat or bowtie can make any simple outfit pop.
When you’re measuring for fit, add a little extra room; after all, your pup’s comfort is key.
Want to make your costume even cooler? Try adding a fun sound element, like jingling bells. Just watch out for that unexpected dance move your dog might do!
Finally, practice wearing the costume at home. You’ll save yourself the embarrassment when it’s showtime.
Frequently Asked Questions
How Can I Safely Measure My Dog for a Costume?
To safely measure your dog, use a soft measuring tape. Measure the neck, chest, and length from neck to tail. Make certain your dog stands still and comfortable while you take these measurements for accuracy.
What Materials Are Best for Allergy-Prone Dogs?
When you dress your allergy-prone dog, think of it like picking fruit for a delicate pie. Opt for natural fabrics like cotton or linen, avoiding synthetics. Always check labels to guarantee safety and comfort.
How Can I Keep My Dog Calm During Costume Fitting?
To keep your dog calm during costume fitting, use treats to reward good behavior, stay patient, and take breaks if needed. Make certain the environment is quiet and familiar to make the experience less stressful for them.
Are There Any Specific Costumes That Should Be Avoided?
You’ll want to steer clear of anything too tight or constricting—imagine your dog in a straitjacket! Avoid masks that obscure their vision and costumes with small parts they could swallow or get tangled in.
How Do I Clean and Maintain the Costumes?
You can clean and maintain the costumes by hand-washing them in cold water with mild detergent. Make sure to air dry them completely before letting your dog wear them again to prevent mold and odors.
Conclusion
So there you have it—seven fun DIY dog costumes to make your pup the star of any gathering. Whether you’re crafting a superhero cape or a dapper tuxedo, let your imagination run wild. After all, who wouldn’t want to see their furry friend strut their stuff, looking absolutely adorable? Don’t fret about perfection; remember, it’s the effort and joy that counts, not a runway-ready tail-wagger. So grab some supplies and get crafting—your pooch is waiting for their moment to shine.