You know that moment when your dog looks at you with those big, puppy eyes, and you just know they want something fun? It’s tough finding toys that keep them entertained without breaking the bank. Luckily, I’ve stumbled upon some super easy DIY dog toys that you can whip up at home. Whether you’re turning old socks into squeaky toys or using tennis balls for a puzzle, you’ll want to stick around to discover more.
Unleash Your Pup’s Imagination
Have you ever watched your dog stare longingly at a plain old tennis ball, wondering what’s going on in that furry head of theirs?
You can release your pup’s imagination with some fun DIY dog toys that’ll keep their tails wagging. Grab some old socks, stuff them with crinkly plastic, and tie them off; you’ve just made a delightful chew toy.
Or how about taking an empty water bottle, wrapping it in a sock, and sealing the ends? Voila, an instant crunch that’ll have your dog barking for joy.
Don’t forget the classic ice treat—freeze chicken broth in a muffin tin! Your pup won’t just play; they’ll be bustling with excitement. Plus, you’ll feel like a dog toy-making wizard.
Our Collection
Let’s take a look at our fun collection of DIY dog toys, shall we?
You’ve got some fantastic options like the Tennis Ball Puzzle Toy that’ll keep your pup guessing.
From the Fleece Tug-of-War Rope to the Stuffed Sock Squeaky Toy, there’s something here that’ll bring a tail-wagging smile to your furry friend’s face.
1. Tennis Ball Puzzle Toy
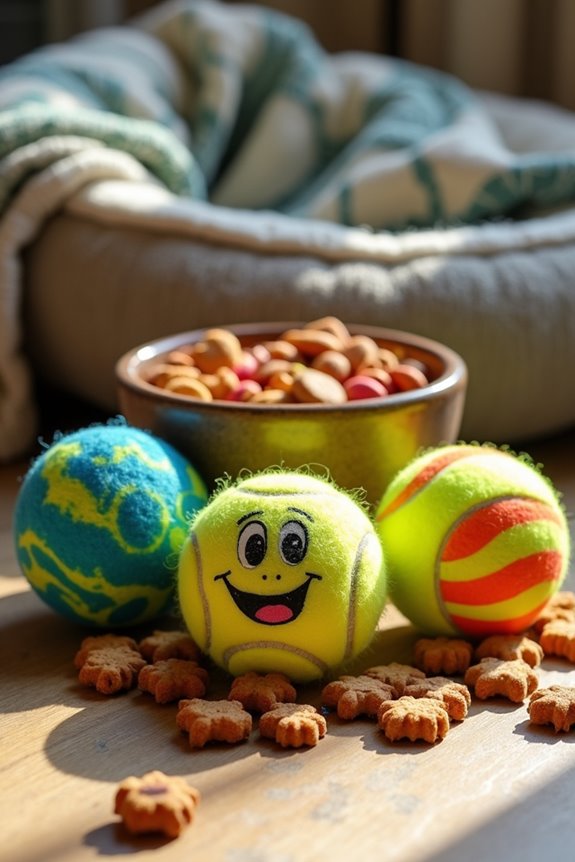
Are you looking for a way to keep your furry friend entertained while saving a few bucks? This tennis ball puzzle toy is the perfect DIY project for dog owners, combining fun and mental stimulation. Plus, it’s a great way to reuse old tennis balls lying around your house. So let’s plunge into it and create a paw-some toy that will keep your pup happily engaged!
Materials Needed:
- Old tennis balls (2-3)
- Sharp knife or scissors
- Treats or kibble (your dog’s favorites)
- Non-toxic adhesive (optional)
- Markers or paint (for personalization)
- Plastic container or muffin tin (for added complexity)
Step-by-Step Instructions:
- Prep Your Tennis Balls: Grab your old tennis balls and make a small cut in each one. Just enough for treats to slip inside but not so big that they fall out easily.
- Fill the Balls: Take a handful of your dog’s favorite treats or kibble and stuff them inside the openings of the tennis balls. Close them up and give them a little shake to confirm the treats settle inside.
- Test the Fit: Make sure the treats can’t just roll out. You might need to adjust that cut if they seem to be escaping too easily. Keep it challenging because we want to engage those clever dog brains!
- Decorate Your Toy: If you’re feeling creative, grab your markers or paint and jazz up those tennis balls. Maybe your dog would prefer a funky tie-dye look or a silly face to create some personality.
- Add Complexity (Optional): If you want to ramp up the challenge, place the filled tennis balls into a plastic container or muffin tin. It’s like the ultimate puzzle for your pup, with an obstacle to overcome to get to the goodies!
- Supervise Playtime: Once everything is ready, throw it to your dog and watch as they figure it out. Although this isn’t an Olympic event for dogs, you might just feel like their coach cheering them on!
Optional Add-ons/Variations:
- Try using different balls; like racquetballs or even something funky like a basketball for a bigger challenge.
- You could also use non-toxic glow-in-the-dark paint to make those tennis balls a fun nighttime toy.
Pro Tip:
Dogs can be masters at destruction when it comes to toys. Keep an eye out for any loose pieces that could become a choking hazard. If your dog is an aggressive chewer, consider adding a little non-toxic adhesive to the cuts after inserting treats. It’ll help secure everything better for longer-lasting fun.
With this simple DIY tennis ball puzzle toy, you can turn a few tennis balls into hours of joy for your pup. Luxury dog collars can complement your dog’s playtime style, adding a touch of elegance while they enjoy their new toy. So grab those old balls and let the creative fun begin! Your dog will thank you with countless tail wags.
2. Fleece Tug-of-War Rope
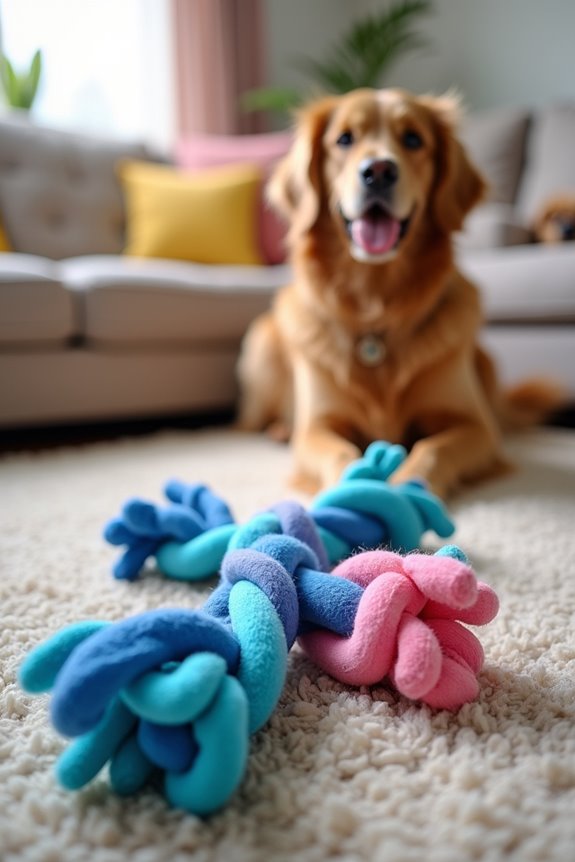
Looking for a fun and easy DIY project that will satisfy your dog’s playful instincts? A fleece tug-of-war rope is just the ticket. Not only is it a fantastic source of entertainment for your pup, but it’s also super budget-friendly! You can save money while making your furry friend a cozy, comfy toy that they can tug on to their heart’s content.
Materials Needed:
- Fleece fabric (2-3 pieces, each about 1.5 feet long and 3-4 inches wide)
- Sharp scissors
- Ruler or measuring tape (optional)
- Dog treats (for bribing or rewarding your dog during playtime, duh!)
Step-by-Step Instructions:
- Cut the Fleece: Grab your fleece fabric and cut it into strips. Each strip should be about 1.5 feet long and 3-4 inches wide. Feel free to mix and match colors for a fun, vibrant look!
- Gather the Strips: Take all your fleece strips and hold them together at one end. You should have about three or four strips together—enough to make a sturdy rope.
- Braid It Up: Start braiding the strips together. Take the left strip, cross it over, then take the right strip and cross it over the new left strip. Repeat this until you reach the end, making sure to keep the braid tight and neat. Also, why did I suddenly feel like a hairdresser?
- Secure the End: Once you reach the end of the braid, take the ends of the strips and tie a knot. Make sure it’s tight, so there’s no chance of unraveling. You can add a second knot for extra security. After all, we don’t want a UFO (Unidentified Fleece Object) scattering bits all over the house while Fido’s playing.
- Trim the Excess: If the ends of your rope look a little unruly, you can trim them down to give your tug toy a polished look. Think of it as giving your new toy a haircut!
- Let the Playtime Begin: Present your new creation to your dog. You might notice their ears perk up with excitement! Engage in a spirited game of tug-of-war, and see just how much joy this simple toy can bring. Plus, it pairs well with premium dog food brands to enhance your pup’s playtime experience.
Optional Add-ons/Variations:
- You can use multiple types of fleece for different textures. Think about flannel or even patterned fleece for a more playful design!
- Why not try adding a squeaky toy inside the braid before you finish? Your pup will most likely get an extra thrill, and who wouldn’t enjoy a bit of squeakiness during a good tug-of-war match?
Pro Tip:
Safety first, always! If you notice any frayed edges while your dog is tugging, it’s time to retire that rope and whip up another one. You wouldn’t want any fluffy pieces becoming a potential choking hazard.
And remember, the more colorful the fleece, the more fun your dog will have!
Now, grab those scissors and fabric, and let’s get to crafting a tug toy that your dog will love. It’ll keep them entertained, and trust me, it’s way more fun than shopping in the pet store for the same thing!
3. Stuffed Sock Squeaky Toy

Looking for a quick and fun DIY toy that will keep your furry friend entertained? The stuffed sock squeaky toy isn’t just a simple project; it’s a way to give old socks a new lease on life while satisfying your pup’s squeaky toy cravings.
Not to mention, it’s an excellent money-saver—turning something that would normally be tossed into the trash into a delightful plaything. Additionally, you can enhance your pup’s comfort and safety by ensuring that their play area is free from dog allergy treatment equipment, which can help mitigate allergy-related concerns.
Materials Needed:
- One clean sock (preferably a thick, colorful one)
- A small squeaky toy (the kind you can find in numerous dog toys)
- Stuffing (like old fabric scraps, cotton balls, or even leftover fleece)
- Sewing needle and thread (or fabric glue for a no-sew option)
- Scissors (if you’re using fabric scraps)
Step-by-Step Instructions:
1. Prepare the Sock: Start with a clean sock. You want it to be soft and snuggly for your pup. If it’s too big, you can simply cut it down to size. No need for precise measurements here—just make it comfortably small for stuffing.
2. Insert the Squeaky Toy: Take your squeaky toy and slide it into the toe of the sock. This will be the star of the show, so make sure it fits snugly but still allows for plenty of stuffing around it.
3. Stuff It Up: Open the rest of the sock and start adding in your stuffing material. This could be any fabric scraps you have lying around or even some cotton balls.
Make sure to fill it well so it’s both fun to chew on and remains a good shape for your pup to wrestle with. Just think of it as fluffing a carpet before guests arrive—except, in this case, your guests are dogs.
4. Close It Up: Once you’re satisfied with the stuffing, it’s time to close up the sock. If you’re using a needle and thread, simply stitch the opening shut—tight enough so the stuffing doesn’t poof out, but neat enough to avoid a future fluff explosion.
If you’re going the fabric glue route, apply a generous amount along the edge, press it together, and let it dry according to the package instructions.
5. Ready to Play: Once your stuffed sock is closed up, give it a good shake. Then present it to your enthusiastic pup!
Watch as they sniff it, bite it, and happily carry their new toy around. You might even find yourself giggling at their silly antics as they try to figure out where that pesky squeak is coming from.
Optional Add-ons/Variations:
– Why not get creative? You can use different colored socks for varied looks.
Pair them with unique stuffing options like leftover plush fleece or fabric that’s soft and cozy.
– You could even try layering multiple squeaky toys inside the sock for a surprise twist. Your dog may just love toggling between squeaks until they find their favorite!
Pro Tip:
Always check your stuffed sock squeaky toy for any signs of wear and tear during playtime.
If you notice any loose seams or stuffing peeking out, it’s probably best to retire the toy for safety’s sake. We want fun, not fluff fluff everywhere. Keeping it clean and safe means more fun-filled playdates ahead!
4. Knotted T-shirt Frisbee

Who said all dog toys have to be expensive? The knotted T-shirt frisbee is a fantastic DIY project that turns used t-shirts into something your furry friend will love to chase. It’s an easy and budget-friendly way to repurpose old clothes while giving dogs a fun, interactive toy. Plus, it’s a great way to keep your pup active and engaged without breaking the bank. Let’s get started on this simple yet rewarding craft!
Materials Needed:
- 1 or 2 old t-shirts (the brighter, the better for visibility)
- Scissors
- A flat surface to work on
Step-by-Step Instructions:
- Choose Your T-Shirts: Grab those old t-shirts that have been hiding at the back of your closet. You can mix and match colors for a fun look. If it’s too small for you, it’s perfect for your pup!
- Cut the Strips: Lay the first t-shirt flat. Cut the bottom hem off, then cut the shirt into long strips about 1-1.5 inches wide. You want a good length to give it some heft and a nice grip when your pup is tugging it.
- Knotting Time: Gather 3-5 strips of fabric together. Tie them into a simple knot at one end, making sure it’s tight enough so it doesn’t come undone during playtime. Think of it as tying your shoelaces—little bit of pressure goes a long way!
- Braid Away: After the first knot, start braiding the strips together. Keep it tight and even—this will be key in making sure the frisbee can withstand those enthusiastic catches and playful tugs.
- Finish with a Knot: Once you’ve got a good length and reached the end of your braiding, tie another knot to secure everything. Trim any excess fabric if needed, but leave some length for a better grip.
- Play Time: Toss it around and let your dog have a go! Watch them leap and catch with excitement as they chase their very own DIY frisbee. You might discover a few hidden athletic talents.
Optional Add-ons/Variations:
- Consider using t-shirts with different patterns or graphics. This won’t only add some personality to the frisbee, but it can also make playtime more visually fun for you and your pup.
- For an extra challenge, incorporate a tennis ball inside the braiding to create a hybrid toy that can work both as a frisbee and a chew toy.
Pro Tip:
Before you let your dog get carried away with their new toy, give it a quick inspection. Make sure all knots are secure and there are no loose ends. This enhances safety and durability, ensuring that your dog stays happy while you enjoy peace of mind. Plus, always supervise your pup during play—just in case they try a little too hard to outsmart that sneaky frisbee.
Now, roll up those sleeves, grab those old t-shirts, and get ready to create a unique toy that will keep your dog entertained for hours. You might even find yourself joining in on the fun as you toss, chase, and giggle together. Happy crafting! Moreover, don’t forget to nourish your dog’s health with premium dog food specifically designed for their needs, including for breeds like Goldendoodles.
5. Cardboard Tube Treat Dispenser
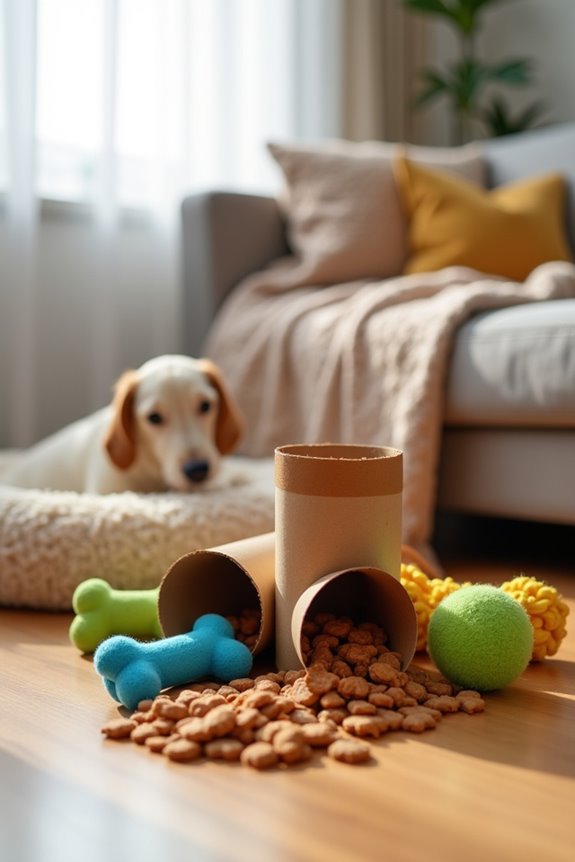
Have you ever watched your dog sniff around, looking for a hidden treasure? Well, you can create that thrill right at home with a Cardboard Tube Treat Dispenser! This DIY project isn’t only super easy, but it also saves you money while providing your pup with hours of entertainment. Plus, it makes use of those empty toilet paper rolls or paper towel tubes that usually just sit in the recycling bin. It’s a win-win for you and your furry friend! Additionally, using high end dog enrichment toys can enhance playtime and provide your pup with even more mental stimulation.
Materials Needed:
- 1 empty toilet paper roll (or a paper towel roll, cut to size)
- Treats or kibble (the usual goodies your dog enjoys)
- Scissors (for those paper towel rolls)
- Optional: tape or sticky paper (to seal one end)
Step-by-Step Instructions:
- Prepare the Tube: If you’re using a paper towel roll, cut it down to a size that’s easy for your pup to handle. A length of about 6 inches works well.
- Seal One End: Take one end of the tube and seal it shut using tape or sticky paper. This will keep the treats from falling out when you fill it. Make sure it sticks well—nobody wants a surprise mess!
- Fill the Tube: Grab your pup’s favorite treats and fill the tube. You can mix different sizes and textures to keep your dog guessing. Just leave a little space at the open end.
- Seal the Other End (Optional): If you want, you can also seal the other end using tape. This adds an extra layer of challenge for your furry detective.
- Let the Fun Begin: Toss the tube on the floor and watch your dog go to town. They’ll nudge, roll, and paw at it, trying to figure out how to get those treats out!
- Observe and Enjoy: Sit back and enjoy the show. You might even want to take some video—it can be quite the performance. Just remember to supervise your pup, so they’re staying safe and having a blast.
Optional Add-ons/Variations:
- For an extra interactive challenge, cover the open end with a piece of fabric, tying it with a knot. Your dog will have to figure out how to move the fabric to get the treats, giving their brain a workout too.
- Try decorating the cardboard tube with dog-safe washable paint or stickers. Personalize it to match your pup’s personality, turning it into a stylish treat dispenser.
Pro Tip:
Before letting your dog enjoy their new toy, always check for any loose bits of cardboard that could come off during playtime. It’s about keeping them safe while having fun. If you notice any wear and tear, it might be time to create a new one. Plus, it gives you an excuse to make another—you can never have too many treats around, right?
6. Water Bottle Crinkle Toy
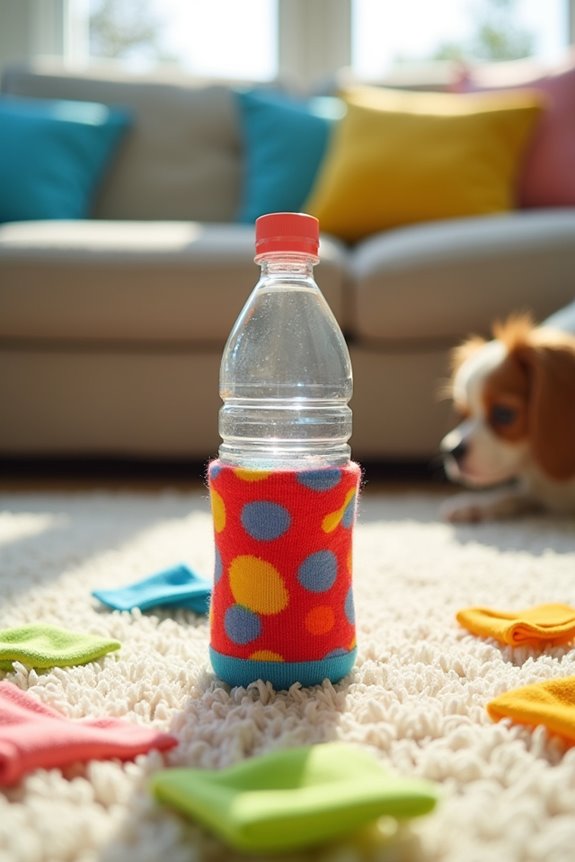
Every dog loves that delightful crinkling sound, don’t they? Well, you can create your very own Water Bottle Crinkle Toy from an empty plastic bottle. This DIY project is a fantastic way to recycle and provide your pup with endless fun.
Plus, it’s a zero-cost option for keeping your four-legged friend entertained—who wouldn’t want that?
Materials Needed:
- 1 empty plastic water bottle (make certain it’s clean and dry)
- A clean sock (preferably one that’s lost its match)
- A pair of scissors (for making any necessary cuts)
- Optional: fabric scraps (to add a little flair)
Step-by-Step Instructions:
1. Prep the Bottle: Start by removing the label from your plastic water bottle and make certain it’s clean. You don’t want your dog munching on any leftover glue, right?
2. Stuff the Sock: Take that lonely sock and insert the empty bottle into it. The sock will work as a cozy cover and provide extra texture while your dog plays.
3. Secure it: If the bottle doesn’t fit snugly in the sock, you can knot the sock tightly at the open end. This way, the bottle stays put during all that excited chewing and gnawing.
4. Add Personal Touches (Optional): If you’re feeling creative, you can take some fabric scraps and stitch or glue them onto the sock for a bit of personality. How cute would it be to have a polka-dotted crinkle toy?
5. Let the Fun Begin: Toss the crinkle toy to your pup and watch their eyes light up. They’ll love the squishy feel and that satisfying crinkle sound.
It might even end up being their new favorite toy, challenging the old ones to a duel!
6. Supervision Time: As always, keep an eye on your pup while they play. Monitor them to make sure all pieces stay intact and that the toy doesn’t become a chewable hazard.
Optional Add-ons/Variations:
- Want to keep calm (and be crafty)? Consider using a fun-patterned fleece or an old T-shirt instead of a sock to give it a warmer feel and add some style to the toy.
- To add more excitement, drop in a squeaky toy before sealing the sock. Your dog will be in sensory heaven with both the crinkle and the squeak.
Pro Tip:
Before letting your dog have a go at this toy, verify the plastic bottle is free of any sharp edges or loose bits that might break off during play.
Safety first, fun second. If you notice any damage, it’s time to craft another—the magic of DIY is that you can always make more.
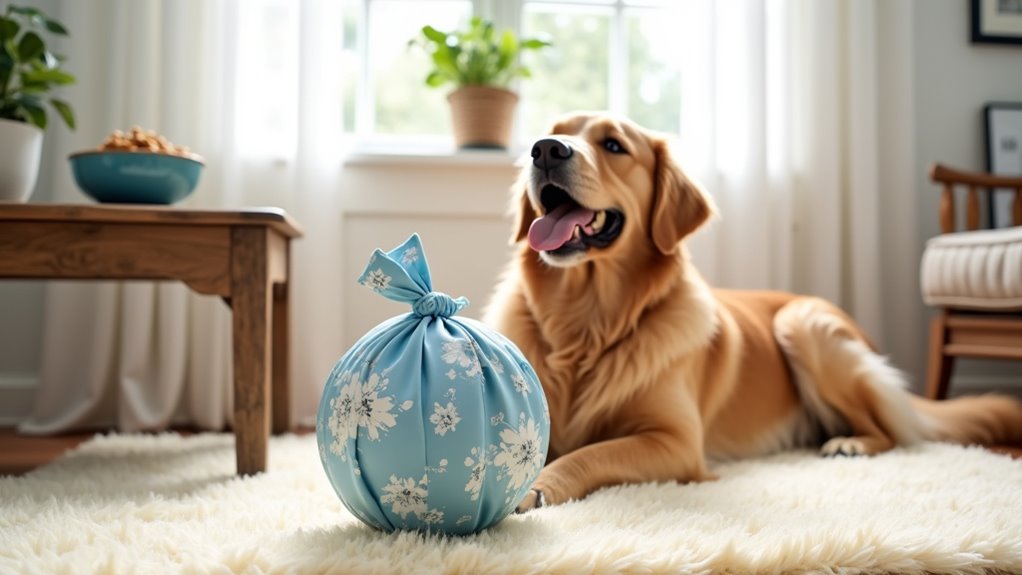
7. Pillowcase Fetch Ball

If your dog loves to fetch but you’re feeling a bit overwhelmed by the price tag of store-bought toys, then this DIY Pillowcase Fetch Ball is for you.
Not only is it easy and budget-friendly, but it’s also a great way to repurpose an old pillowcase—transforming it into a
Extra Tips & Ideas
While you might already be bursting with ideas for DIY dog toys, there’s always room for a little extra creativity to keep your pup entertained and engaged.
Have you thought about adding scents? Stuff an old sock with treats and spritz it with a bit of chicken broth. Your dog’ll go wild!
Or, try a simple tug toy with different fabric scraps. You just tie them together, and voilà! Hours of fun.
Don’t forget to mix it up. Rotate the toys weekly; this keeps your pup curious.
Sometimes, they’ll play with a cardboard box more than fancy toys. Seriously. Your dog might just be a little weirdo.
But hey, we love them anyway. Just like that sock, they can be a little crazy but full of joy.
Frequently Asked Questions
What Materials Are Safe for Making DIY Dog Toys?
You can use materials like old t-shirts, socks, tennis balls, and natural rope to make DIY dog toys. Just verify they’re free of harmful chemicals, small parts, and anything your dog might easily swallow.
How Often Should I Replace My Dog’s DIY Toys?
If your dog chews through a toy within days, it’s time to replace it. You should replace DIY toys every month or sooner if they show wear, ensuring your pup stays safe and entertained.
Are There Any Choking Hazards With Homemade Dog Toys?
Yes, there can be choking hazards with homemade dog toys. Always guarantee parts are securely attached, use non-toxic materials, and avoid small pieces. Regularly inspect toys for wear to keep your dog safe while playing.
Can I Personalize DIY Toys for My Dog’s Preferences?
Sure, you can personalize DIY toys to match your dog’s preferences. Just remember, if your dog’s a picky eater, saucing up that tennis ball probably won’t make it more appealing. Get creative with their favorite textures!
What Are Some Eco-Friendly Options for Crafting Dog Toys?
You can use materials like old t-shirts, natural jute, or recycled cardboard. Adding cotton stuffing from old pillows creates a soft toy. Just make certain everything’s safe for your pup, avoiding toxic materials. Have fun crafting!
Conclusion
Creating these DIY dog toys is like throwing a party for your pup—fun, exciting, and full of surprises. You don’t need to break the bank to keep your furry friend entertained. Plus, each toy reflects your dog’s quirks, making playtime even more special. So grab those old socks and cardboard tubes, and get crafting. You’ll be amazed at how much joy a little creativity can bring to your dog’s day, and hey, you might just enjoy it too.