
Have you ever thought about whipping up some quick treats for your pup but felt overwhelmed by complex recipes? You’re not alone. It’s so easy to get caught up in that chaos, but let’s face it—your furry friend wouldn’t care if you made gourmet biscuits or simple chewables. These 7 quick 2-ingredient dog treats are not only a breeze to make, but they’ll have your dog wagging their tail like crazy. Curious about the flavors? Let’s get started.
Why Homemade?
Why Homemade? You want your dog to be happy and healthy, right? That’s where 2 ingredient dog treats come in. These simple snacks aren’t just easy to make; they let you control every ingredient. No weird additives or mystery meat. Instead, you’re using wholesome ingredients your pup will love.
Picture it—your furry friend watching you whip up those treats with those big, expectant eyes. Mixing peanut butter and oats, it’s as easy as pie—really! You can feel like a gourmet chef, even if the last time you tried to bake, the smoke alarm went off. Plus, many dog treat recipes provide delicious homemade dog biscuits, ensuring your dog receives a balanced diet.
Making homemade treats saves money too. Store-bought treats can add up, especially if your dog has expensive taste.
Homemade treats are budget-friendly, letting you spoil your pup without breaking the bank!
Plus, you get that priceless moment when your dog does a happy dance for something you made just for them. Homemade means love in every bite, and who wouldn’t want that? Creating these treats at home can also deepen your bond with your dog through homemade interactions that foster trust and loyalty. This is especially true when the treats are made from nutritious ingredients that cater to their individual health needs.
Treat Recipes Overview
Ready to whip up some treats your pup will go crazy for? You’ve got a lineup of fantastic recipes just waiting to be scooped out of the mixing bowl, like Peanut Butter Banana Bites and Sweet Potato Biscuits. Dogs love these treats not just for their taste, but also for their nutritional benefits, making them a great addition to your pet’s diet. These Peanut Butter Apple Sauce Treats are not only a hit for their flavor but also packed with wholesome ingredients. Additionally, homemade treats can ensure you’re using fresh and safe ingredients that meet your dog’s dietary needs. It’s important to remember that these simple ingredients can lead to healthier snack options for dogs. Let’s get those tails wagging as we explore how to make these delicious snacks that’ll have your furry friend begging for more.
1. Peanut Butter Banana Bites
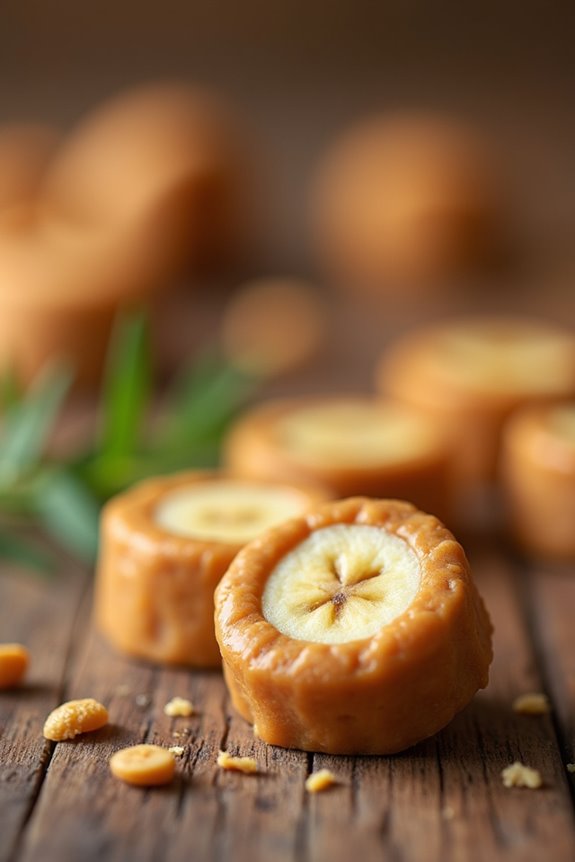
If you’re looking to whip up something special for your pup, Peanut Butter Banana Bites are a fantastic choice. You’ll only need a few simple ingredients, and the step-by-step instructions make it a breeze—even if your kitchen skills are spotty. Plus, there are some fun optional add-ons that could turn these treats into a delicious masterpiece. Adding pumpkin to your dog treats can provide nutritional benefits that are great for your pup’s health, as well as enhancing digestive health for a happy tummy.
Ingredients
- 1 ripe banana, mashed (the riper, the sweeter—perfect for those pup palates)
- 1 cup whole wheat flour (you might’ve this already in your pantry)
- 1/2 cup natural peanut butter (make sure it’s xylitol-free; your pup’s safety first!)
- 1/4 cup oats (just regular oats, nothing fancy here)
- 1/4 cup unsweetened apple sauce (feel free to taste a spoonful for yourself too, just to be sure!)
That’s it! Pretty streamlined, right?
You might be wondering, “Can my dog really enjoy that?” Absolutely. Your four-legged buddy will gobble these down faster than you can say “treat time.”
Plus, with just a handful of ingredients, you won’t need a treasure map to navigate the grocery aisles.
Now, let’s get cooking!
Step by Step Instructions
To make Peanut Butter Banana Bites, you’ll need just a few ingredients and a bit of time. These tasty treats are a hit with pups of all sizes. Follow these simple steps to whip up a batch.
- Preheat your oven to 350°F (175°C) to get it nice and toasty for baking.
- In a mixing bowl, mash 1 ripe banana with a fork until it’s smooth. If it’s a bit lumpy, don’t worry—your dog won’t mind.
- Add 1/2 cup of peanut butter to the mashed banana, stirring until they’re well combined. (Make sure to use unsweetened peanut butter—no need for sugar!)
- Gradually add 1 cup of whole wheat flour to the mixture, stirring until a dough forms. Don’t overmix; it’s okay if it’s a tad sticky.
- On a floured surface, roll out the dough to about 1/4 inch thick. If it’s sticking to the counter, just sprinkle a little more flour; your dog isn’t judging your rolling skills.
- Cut the dough into bite-sized pieces using a cookie cutter or knife. Get creative with shapes if you want, but squares work just fine.
- Place the treats on a baking sheet lined with parchment paper, making sure they’re spaced out a bit. They’re going to expand just slightly.
- Bake the treats in the preheated oven for 15-20 minutes, or until they’re firm and lightly golden. Keep an eye on them so they don’t burn—no one wants overcooked goodness.
- Once baked, take them out and let them cool completely on a wire rack. Your pup has no patience, but cooling is key for their safety.
Cool completely before serving to your dog. Enjoy the happy tail-wagging from your furry friend!
Optional Add-ons
Why stick to the basics when you can mix things up with a few optional add-ons to your Peanut Butter Banana Bites?
Toss in some oats for texture, or a sprinkle of cinnamon for a warm touch. Got some pumpkin puree? That’s a great way to sneak in extra nutrition.
2. Sweet Potato Biscuits
Let’s talk about making sweet potato biscuits for your pup.
You’ll love how simple the ingredients are, plus I’ve got step-by-step instructions that even I can’t mess up (well, I try not to).
And hey, if you want to get fancy, we can explore some optional add-ons to make these treats even more tail-wagging good.
Ingredients
When it comes to treating your furry friend, there’s nothing quite like homemade goodies that they can truly enjoy. Sweet potato biscuits aren’t only simple to whip up but also packed with flavor and nutrition that your pup will love.
So if you’re ready to spoil your dog with some tasty, tail-wagging bites, here’s what you’ll need:
- 1 cup mashed sweet potato (about 1 medium potato, cooked and peeled)
- 2 ½ cups whole wheat flour
- 1/4 cup rolled oats
- 1/4 cup peanut butter (just make sure there’s no xylitol in it)
- 1/4 cup low-sodium chicken broth (or water if you prefer)
- 1 egg (large, preferably organic)
These ingredients are pretty standard, right? Most of them you probably have hanging around your kitchen, and even if you don’t, they’re easy to find at your local store.
Plus, your dog’s wagging tail will thank you for the effort. Let’s be real – I might even be more excited than my dog when I see those sweet potato biscuits coming out of the oven. Who knew a simple mix could make such happy pup faces?
Step by Step Instructions
- Preheat your oven to 350°F (175°C). This will get your kitchen nice and warm, and trust me, your dog will appreciate the aroma of freshly baked treats.
- Wash and peel 1 large sweet potato. This isn’t just for show; you want to get rid of any dirt or skin that might sneak into your treats.
- Chop the sweet potato into small cubes. Aim for about 1-inch pieces; this helps them cook evenly.
- Boil the sweet potato cubes in a pot of water for about 15-20 minutes or until they’re fork-tender. You want them soft enough to mash, so don’t skimp on the time.
- Drain the sweet potato and let it cool for a few minutes. Don’t burn your fingers trying to handle the hot cubes – that would just be embarrassing.
- In a big mixing bowl, mash the sweet potato until smooth. If you have a potato masher, this is the time to shine! No masher? A fork will do, but you might be there a while.
- Add 2 cups of whole wheat flour, 1 egg, and 1 teaspoon of cinnamon to the bowl. Mix everything together until you have a dough. It might be a little sticky, but that’s okay—just roll with it.
- Lightly flour your countertop and turn the dough out onto it. Knead it gently for about a minute, just to combine everything well.
- Roll out the dough to about 1/4-inch thickness. Don’t worry about it being perfect; your dog isn’t judging your rolling skills.
- Use cookie cutters to cut out fun shapes. Or just stick with squares—it’s all going in the same happy belly anyway.
- Place the cutout treats on a baking sheet lined with parchment paper. Give them some space; they’re going to puff up a bit.
- Bake in the preheated oven for 25-30 minutes, or until the biscuits are golden brown. Your kitchen should smell amazing by now; just wait until your pup gets a whiff.
- Remove the treats from the oven and let them cool on a wire rack. This step is essential—hot treats can burn little doggos’ tongues.
- Cool completely before serving to your dog. Trust me, you’ll want to avoid any culinary catastrophes.
Optional Add-ons
There are countless ways to jazz up your sweet potato dog biscuits, so why not take a moment to explore some optional add-ons that can elevate the flavor and fun?
Think peanut butter for richness, or a sprinkle of cinnamon for warmth. Got pumpkin? Toss it in!
Your pup won’t know what hit them. Just don’t forget to taste test—wait, no, that’s for us, right?
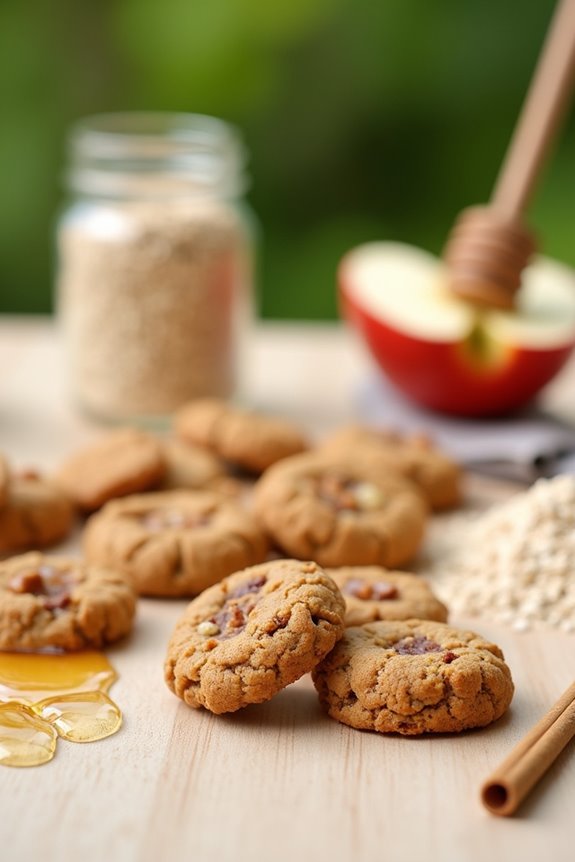
3. Apple Oatmeal Chews

Ready to whip up some Apple Oatmeal Chews for your pup? You’ll need just a handful of simple ingredients, and I promise, it’s easier than it sounds. So, let’s walk through the step-by-step instructions together, and I’ll sprinkle in some optional add-ons to make these treats even more special.
Ingredients
When it comes to making your pup’s treats, you want to keep it simple and safe. These Apple Oatmeal Chews aren’t just tasty; they’re also packed with wholesome ingredients that your furry friend will love.
Plus, making your own treats can be a fun little project. Just follow this easy list, and you’ll be whipping up something special in no time.
- 1 cup rolled oats
- 1/2 cup unsweetened applesauce
- 1/2 cup whole wheat flour
- 1/4 cup water (you might need a bit more if the dough feels too dry)
- 1/2 teaspoon cinnamon (make sure it’s the safe kind, not the toxic Cassia)
- 1 egg
See? Super straightforward and good for your dog.
And just think, with each chew, your pup will be munching on these tasty treats, knowing they were made with love by you. Just don’t be surprised if they start giving you their best puppy eyes while you’re whipping these up—because, honestly, who can resist that?
Step by Step Instructions
1. Preheat your oven to 350°F (175°C) so it’s nice and warm when you’re ready to bake.
2. Grab a large mixing bowl and combine 1 cup of rolled oats and 1 cup of whole wheat flour. This is where that yummy, chewy texture starts to form.
3. In a separate bowl, mix together 1 cup of unsweetened applesauce, 1 tablespoon of honey (or maple syrup if you want to go vegan), and 1 large egg. Whisk until everything’s nicely blended—think of it as a frothy doggie smoothie.
4. Pour the wet mixture into the dry ingredients. Gently fold them together until just combined (don’t overmix; a few lumps are perfectly fine).
5. If you’re feeling adventurous, you could add a half-cup of diced apples or even a sprinkle of cinnamon for some extra flavor. Your dog might just give you a grateful wag of their tail.
6. Line a baking sheet with parchment paper to keep the treats from sticking—a little prep goes a long way, trust me.
7. Scoop spoonfuls of the dough onto the baking sheet, leaving a bit of space between each one. Shape them into little rounds.
They won’t spread much, so shape them how you want them to look after baking.
8. Bake in the preheated oven for 25–30 minutes, or until they turn golden brown on the edges. The smell will drive you (and your dog) a little wild.
9. Once baked, take them out of the oven and let them cool on the baking sheet for a few minutes before transferring them to a wire rack.
10. Cool completely before serving to your dog, or else you might find them smashing into the treats like they’re on a mission to win a prize.
Optional Add-ons
After whipping up a batch of those delicious treats, you might be wondering how to level up the flavor game for your pup.
Consider adding a spoonful of peanut butter or mashed banana for extra yum. You could even toss in a sprinkle of cinnamon or some shredded veggies.
Just think—your dog’s tail could wag even harder. It’s all about making tail-wagging magic happen.
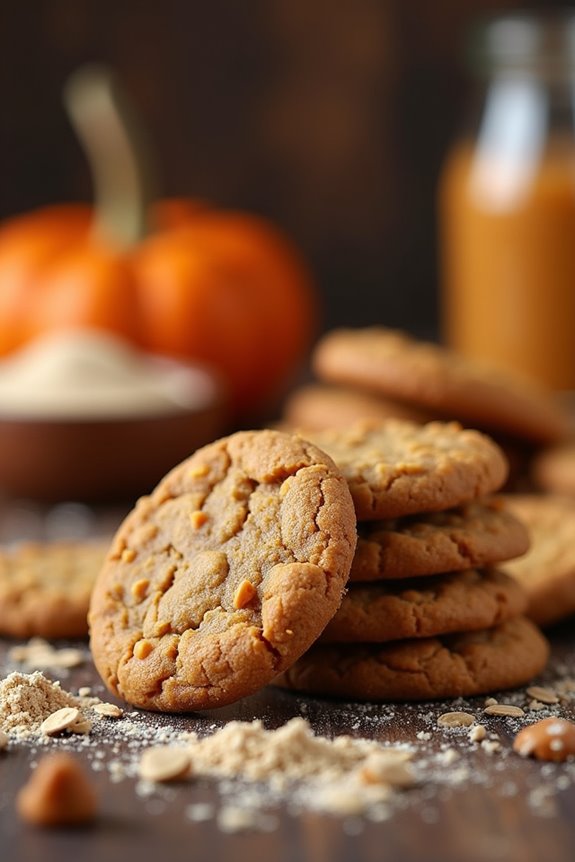
4. Pumpkin Peanut Butter Delights
Let’s whip up some Pumpkin Peanut Butter Delights that’ll have your pup wagging their tail in pure delight. You’ll need just a few simple ingredients, and guess what? I’ll guide you through each step, plus throw in a couple of fun add-ons if you’re feeling adventurous. Ready to turn your kitchen into a dog treat bakery?
Ingredients
Looking to whip up some tasty treats for your furry friend? Pumpkin Peanut Butter Delights aren’t only a hit with dogs, but they’re also super easy to make. Plus, there’s something about that peanut butter aroma that just makes you want to plunge into the mix, right?
Just remember, while you’re baking, keep an eye out for those adorable, pleading puppy eyes watching you from the kitchen. Here’s what you’ll need:
- 1 cup pure pumpkin puree (not the spiced pie filling)
- 1/2 cup natural peanut butter (make sure it’s xylitol-free)
- 2 cups whole wheat flour (or oat flour for a gluten-free version)
- 1/4 cup rolled oats
- 1/2 teaspoon cinnamon (optional, but dogs love the smell)
- 1/4 cup water (or as needed for dough consistency)
Simple, right? Grab those ingredients, and let’s get baking! You’re just a few steps away from earning some serious tail wags.
Step by Step Instructions
- Preheat your oven to 350°F (175°C) so it’s nice and warm when your treats are ready to bake.
- Gather all your ingredients: 1 cup of pumpkin puree, 1/2 cup of peanut butter, 2 cups of whole wheat flour, and 1/2 cup of oats.
- In a large mixing bowl, combine the pumpkin puree and peanut butter. Mix until smooth and well blended.
- Gradually add the whole wheat flour and oats to the mixture. Stir gently until everything is combined (but don’t overmix—lumpy is okay!).
- Turn the dough out onto a floured surface. Knead it lightly for a minute or two until it holds together nicely.
- Roll out the dough to about 1/4 inch thick. You want it thick enough to hold its shape but not so thick that your dog thinks he’s chewing on a shoe.
- Use cookie cutters to cut out shapes. Feel free to make the treats in fun forms—dogs love variety!
- Place the cut shapes on a parchment-lined baking sheet. Make sure they aren’t too close together, as they’ll spread a little while baking.
- Bake in the preheated oven for 25–30 minutes, or until they’re golden brown and firm to the touch.
- Remove them from the oven and let them cool on a wire rack.
Remember, they need to cool completely before serving to your dog.
Your furry friend will thank you with all the tail wags and puppy eyes!
Optional Add-ons
When it comes to whipping up treats for your pup, the classic combination of pumpkin and peanut butter is a winner every time.
Spice things up by adding a sprinkle of cinnamon or a spoonful of honey—your dog won’t know what hit ’em.
And don’t forget, you can toss in some mashed bananas for that sweet twist.
Trust me, they’ll go nuts over it.
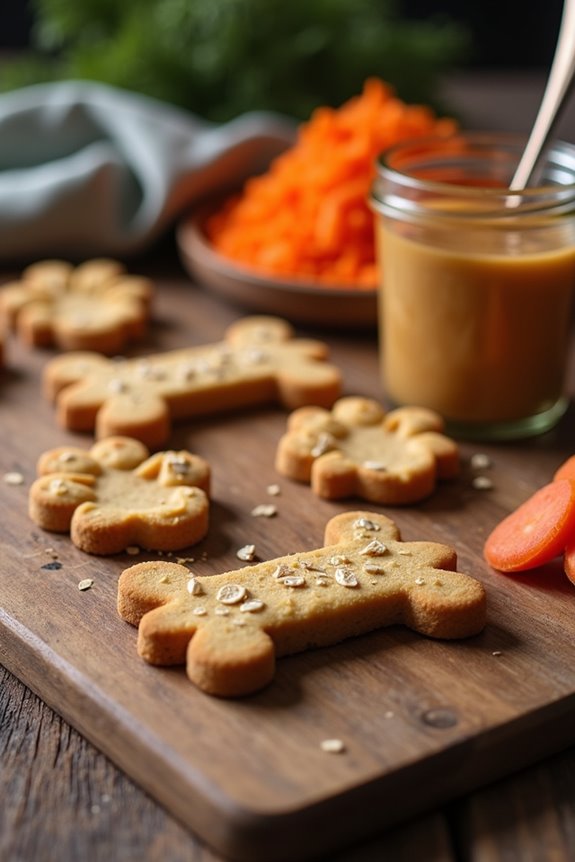
5. Peanut Butter Carrot Cookies
Let’s whip up some tasty Peanut Butter Carrot Cookies for your pup. You’ve got your ingredients ready, right? We’ll cover everything from step-by-step instructions to fun optional add-ons; soon, your kitchen will smell amazing and your dog will be wagging their tail for more.
Ingredients
Alright, if you’re looking to whip up some delicious peanut butter carrot cookies for your furry friend, you’re in the right place.
Not only are they easy to make, but your pup will absolutely love them (trust me, I’ve tried it with my dog, Max, and let’s just say, he didn’t leave a crumb).
So, without further ado, here’s what you’ll need to get started:
- 1 cup natural peanut butter (make sure it’s xylitol-free)
- 1 cup finely grated carrots (fresh, please—no one likes a mushy cookie)
- 2 cups whole wheat flour (if your dog is sensitive to wheat, you can substitute with oat flour)
- 1/2 cup unsweetened applesauce (helps keep the cookies moist)
- 2 tablespoons honey (a little sweetness never hurt anyone)
- 1 large egg (don’t go cracking it on your head, though)
Gather these ingredients, and believe me, your dog will be wagging its tail before you know it.
Let’s bake some love into those treats!
Step by Step Instructions
To whip up some delicious peanut butter carrot cookies for your furry friend, follow these easy steps. You’ll have your dog drooling in no time while you get the kitchen all set!
1. Preheat your oven to 350°F (175°C). Get it nice and warm for those cookies.
2. In a mixing bowl, combine 1 cup of whole wheat flour, 1/2 cup of rolled oats, and 1/2 cup of grated carrots. Give it a good stir until everything is evenly mixed.
3. In a separate bowl, stir together 1/4 cup of peanut butter and 1/4 cup of unsweetened applesauce until it’s smooth and creamy.
(Need a snack? Just a tiny taste of peanut butter never hurt anyone.)
4. Add the peanut butter mixture to the flour mixture, blending them together until they’re just combined.
(No need to go overboard—lumpy is fine!)
5. Knead the dough gently on a floured surface for about 1 minute. It should come together without being too sticky.
6. Roll out the dough to about 1/4-inch thickness. Use a cookie cutter to make fun shapes!
7. Place the cookies on a lined baking sheet. Leave a little space between each one—they need their room to puff up.
8. Bake in the preheated oven for 25–30 minutes, until they’re golden brown and your kitchen smells heavenly.
9. Once they’re done baking, take them out and let them cool on a wire rack.
(Trust me, nobody likes a burned tongue—especially your pup.)
10. Cool completely before serving to your dog. They’ll be wagging their tail in gratitude while you playfully pretend to be a master baker.
Optional Add-ons
While your kitchen fills with the delicious scent of those freshly baked peanut butter carrot cookies, you might find yourself wondering how to take these treats to the next level.
Why not mix in some oats for a heartier bite or add a sprinkle of cinnamon for warmth? You could even toss in some mashed banana.
Your pup will think you’ve gone gourmet, trust me.
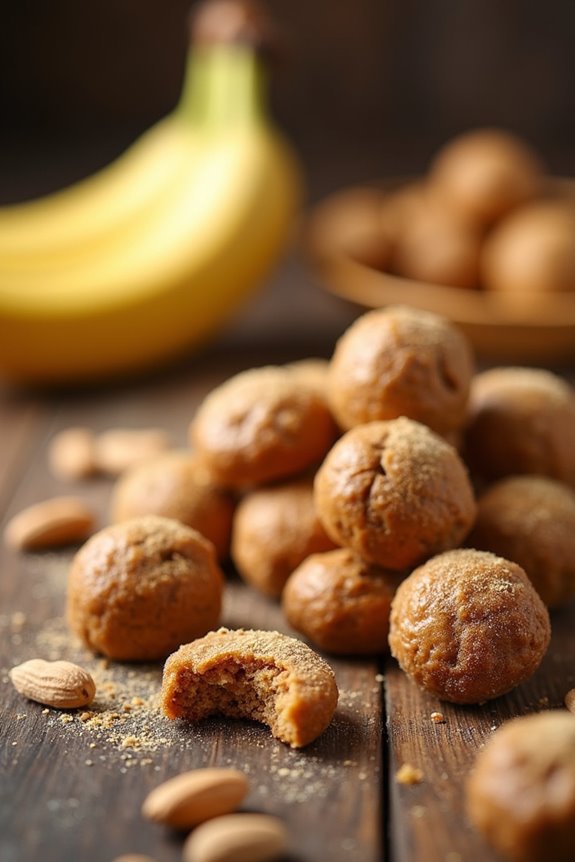
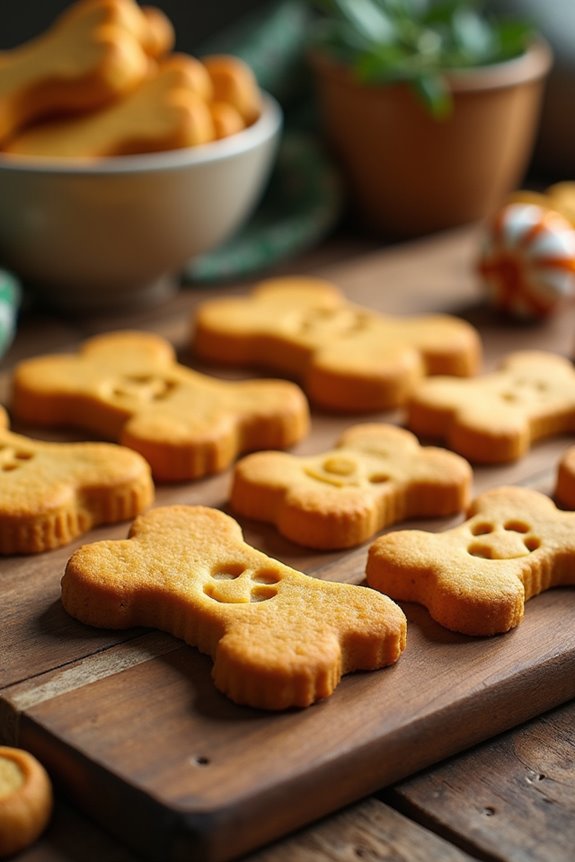
6. Peanut Butter and Pumpkin Puffs
Ready to whip up something your pup will love? Peanut Butter and Pumpkin Puffs are packed with simple ingredients that just scream tail-wagging delight. We’ll walk through the step-by-step instructions and even toss in some optional add-ons to really get those puppy eyes shining.
Ingredients
If you’re on the hunt for a tasty treat to whip up for your pup, Peanut Butter and Pumpkin Puffs are a perfect choice. They’re not just easy to make but also use ingredients that are safe and healthy for your furry friend. Plus, who doesn’t love the smell of peanut butter wafting through the kitchen? Trust me, your dog will be sitting by your feet, begging for one of these little nuggets the moment the aroma hits the air. So, let’s gather up these simple ingredients and get started!
- 1 cup whole wheat flour (make sure it’s dog-friendly)
- 1/2 cup canned pumpkin (not the spiced pie filling)
- 1/4 cup peanut butter (preferably unsweetened and xylitol-free)
- 1/2 teaspoon baking powder
- 1/4 cup water (more if needed, to get the right dough consistency)
Step by Step Instructions
1. Preheat your oven to 350°F (175°C) so it’s nice and hot when you’re ready to bake.
2. In a mixing bowl, combine 1 cup of pumpkin puree, 1/2 cup of peanut butter, and 2 eggs. Stir until everything is well combined.
(Don’t worry if it looks a bit lumpy; that’s part of the charm!)
3. Add 2 1/2 cups of whole wheat flour to the bowl. Mix until the dough starts to come together.
(You may need to use your hands for this part—embrace the mess!)
4. Roll out the dough on a floured surface to about 1/4 inch thick.
5. Use cookie cutters to cut out shapes—bone shapes are a classic for a dog treat, but go wild if you want.
6. Place the cut shapes on a baking sheet lined with parchment paper, leaving a little space between each treat.
7. Bake in the preheated oven for 25–30 minutes, until the treats are golden brown and firm to the touch.
8. Remove the baking sheet from the oven and let the treats cool completely on a wire rack.
9. Store the cooled treats in an airtight container, or if you’re feeling generous, share them with your dog as a special snack.
(Just be sure to let them cool first so you don’t burn those tiny pup tongues.)
Optional Add-ons
Have you ever wondered how to elevate your homemade dog treats to the next level?
Well, consider adding oats or a splash of honey. These little add-ons can make your Peanut Butter and Pumpkin Puffs even more drool-worthy.
Trust me, your pup will think they’ve hit the treat jackpot. After all, who doesn’t love a surprise in their snack?
7. Chickpea and Spinach Bites
Ready to whip up some tasty Chickpea and Spinach Bites for your pup? You’ll need just a few ingredients, and I promise, it’s easier than finding your dog’s favorite toy under the couch. Let’s break down the steps and even toss in some optional add-ons to keep things exciting!
Ingredients
Making these Chickpea and Spinach Bites is a breeze, and your furry friend will thank you for it. With just a handful of simple ingredients, you’ll whip up treats that are tasty, healthy, and free from any doggie no-nos. Here’s what you’ll need to gather from your kitchen or local grocery store:
- 1 cup cooked chickpeas (drained and rinsed if using canned)
- 1 cup fresh spinach (lightly packed)
- 1/2 cup whole wheat flour (or oat flour for a gluten-free option)
- 1/4 cup grated carrot (because who doesn’t love a little crunch)
- 1 tablespoon olive oil (for some added richness)
- 1/4 cup water (adjust as needed for consistency)
Step by Step Instructions
Homemade dog treats aren’t only a great way to show your furry friend some love, but they’re also super easy to whip up. Here’s how to make Chickpea and Spinach Bites that your dog will drool over. Let’s get cooking!
- Preheat your oven to 350°F (175°C) while you gather your ingredients. Get that kitchen warmed up!
- Rinse and drain one can of chickpeas. Smash them gently with a fork until they’re mostly smooth but still have some chunks. Good luck maintaining your sanity—this isn’t a perfect science.
- In a large mixing bowl, add the smashed chickpeas, 1 cup of finely chopped spinach, and 1/2 cup of oat flour. If you don’t have oat flour around, you can blend rolled oats until fine. Just don’t blend it into a pancake batter.
- Mix everything together until it’s well combined. Use your hands if you want—it’s fun getting a little messy!
- Form the mixture into small bite-sized balls or flat discs. Aim for about one inch in diameter. Yes, it’s a small size because we’re not trying to super-size our dogs, right?
- Place the bites onto a baking sheet lined with parchment paper. Make sure they’re spaced out so they’ve room to breathe and expand a bit.
- Bake for 25–30 minutes, until the bites are golden brown and slightly firm. You’ll know they’re ready when your kitchen smells like a dream come true.
- Let the treats cool on the baking sheet for about 10 minutes. Then, transfer them to a wire rack to cool completely.
Cool completely before serving to your dog. After all that effort, you want to make sure they don’t burn their tiny tongues!
Optional Add-ons
You may find that these Chickpea and Spinach Bites are just the beginning of your adventure in homemade dog treats.
Want to jazz them up? Consider adding shredded carrots or a sprinkle of nutritional yeast for extra flavor.
Don’t worry if you toss in a bit too much; your pup won’t mind. It’s all about experimenting and finding what makes those tails wag with delight.
Quality Ingredients Matter
While it might be tempting to grab the first bag of dog treats off the shelf, have you ever stopped to think about what those ingredients really are? You might be surprised. Often, you’ll find a list packed with fillers, preservatives, and ingredients you can’t pronounce. Would you eat that? Exactly. Your furry friend deserves better.
When you whip up quick 2-ingredient treats, you’re in control. Think fresh veggies or organic peanut butter.
These quality ingredients can help keep your pup wagging and healthy. Plus, have you ever noticed how much more they appreciate homemade goodies? They practically dance with joy.
Frequently Asked Questions
Can These Treats Be Frozen for Later Use?
Yes, you can freeze these treats for later use. Just make sure to store them in an airtight container or freezer bag. Thaw them at room temperature before giving them to your furry friend!
Are These Recipes Suitable for All Dog Breeds?
Yes, these recipes are generally suitable for all dog breeds. However, it’s always best to take into account your dog’s specific dietary needs and any allergies before introducing new treats into their diet.
How Long Do the Treats Typically Last?
The treats typically last about a week at room temperature. If you store them in the fridge, they can last up to two weeks. Just make sure to keep them in an airtight container!
Can I Substitute Different Ingredients if Needed?
Yes, you can substitute different ingredients if needed! Just make sure they’re safe for dogs and maintain the right consistency. Experimenting can lead to new flavors your pup might love even more than the originals!
How Should I Store These Homemade Treats?
Store your homemade treats in an airtight container at room temperature for up to a week. For longer freshness, keep them in the fridge for about two weeks, or freeze them for a few months.